


Votos - 7, Puntuación media: 3.9
(

 )
)
|
Fotos y especificaciones JVC KD-G521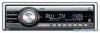 |


Resumen del manual
Should this occur, the CD player may malfunction. In this case, eject the disc and leave the unit turned on for a few hours until the moisture evaporates. How to handle discs When removing a disc from Center holder its case, press down the center holder of the case and lift the disc out, holding it by the edges. • Always hold the disc by the edges. Do not touch its recording surface. When storing a disc into its case, gently insert the disc around the center holder (with the printed surface facing up). • Make sure to store discs into the cases after use. To keep discs clean A dirty disc may not play correctly. If a disc does become dirty, wipe it with a soft cloth in a straight line from center to edge. • Do not use any solvent (for example, conventional record cleaner, spray, thinner, benzine, etc.) to clean discs. To play new discs New discs may have some rough spots around the inner and outer edges. If such a disc is used, this unit may reject the disc. To remove these rough spots, rub the edges with a pencil or ball-point pen, etc. Warped disc Sticker Sticker residue Disc Stick-on label Do not use the following discs: TroubleshootingTroubleshooting What appears to be trouble is not always serious. Check the following points before calling a service center. ENGLISH Symptoms Remedies/Causes General• Sound cannot be heard from the speakers. • Adjust the volume to the optimum level. • Check the cords and connections. • The unit does not work at all. Reset the unit (see page 2). FM/AM Disc playback• Disc can be neither played back nor ejected. • Unlock the disc (see page 12). • Eject the disc forcibly (see page 2). • Disc sound is sometimes interrupted. • Stop playback while driving on rough roads. • Change the disc. • Check the cords and connections. • SSM automatic presetting does not Store stations manually. work. • Static noise while listening to the Connect the aerial firmly. radio. • Disc cannot be played back. Insert the disc correctly. • CD-R/CD-RW cannot be played • Insert a finalized CD-R/CD-RW. back. • Finalize the CD-R/CD-RW with the component • Tracks on the CD-R/CD-RW cannot which you used for recording. be skipped. MP3/WMA playback • Disc cannot be played back. • Use a disc with MP3/WMA tracks recorded in the format compliant with ISO 9660 Level 1, Level 2, Romeo, or Joliet. • Add the extension code <.mp3> or <.wma> to the file names. • Noise is generated. Skip to another track or change the disc. (Do not add the extension code <.mp3> or <.wma> to non-MP3 or WMA tracks.) To be continued... Symptoms Remedies/Causes Symptoms Remedies/Causes ENGLISH MP3/WMA playback • A longer readout time is required (“CHECK” keeps flashing on the display). Do not use too many hierarchies and folders. • Tracks do not play back in the order you have intended them to play. Playback order is determined when the files are recorded. • Elapsed playing time is not correct. This sometimes occurs during play. This is caused by how the tracks are recorded on the disc. • “NO FILES” appears on the display. Insert a disc that contains MP3/WMA tracks. • Correct characters are not displayed (e.g. album name). This unit can only display alphabets (upper case), numbers, and a limited number of symbols. • “NO DISC” appears on the display. Insert a disc into the magazine. • “NO MAG” appears on the display. Insert the magazine. • “RESET 8” appears on the display. CD changerConnect this unit and the CD changer correctly and press the reset button of the CD changer. • “RESET 1” – “RESET 7” appears on the display. Press the reset button of the CD changer. • The CD changer does not work at all. Reset the unit (see page 2). • “noSIGNAL” appears on the display. Move to an area with stronger signals. • “RESET 8” appears on the display. DAB Connect this unit and the DAB tuner correctly and reset the unit (see page 2). • “ANTENANG” appears on the display. Check the cords and connections. • The DAB tuner does not work at all. Reconnect this unit and the DAB tuner correctly and reset the unit (see page 2). • Microsoft and Windows Media are either registered trademarks or trademarks of Microsoft Corporation in the United States and/or other countries. SpecificationsSpecifications AUDIO AMPLIFIER SECTION Maximum Power Output: Front: 50 W per channel Rear: 50 W per channel Continuous Power Output (RMS): Front: 19 W per channel into 4 ., 40 Hz to 20 000 Hz at no more than 0.8% total harmonic distortion. Rear: 19 W per channel into 4 ., 40 Hz to 20 000 Hz at no more than 0.8% total harmonic distortion. Load Impedance: 4 . (4 . to 8 . allowance) Tone Control Range: Bass: ±10 dB at 100 Hz Treble: ±10 dB at 10 kHz Frequency Response: 40 Hz to 20 000 Hz Signal-to-Noise Ratio: 70 dB Line-Out Level/Impedance: 2.5 V/20 k. load (full scale) Output Impedance: 1 k. Other Terminals: CD changer, Steering wheel remote input, AUX (auxiliary) input jack TUNER SECTION Frequency Range: FM: 87.5 MHz to 108.0 MHz AM: (MW) 522 kHz to 1 620 kHz (LW) 144 kHz to 279 kHz...