


Votos - 3, Puntuación media: 4
(

 )
)
|
Fotos y especificaciones Sony DAV-LF1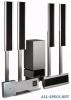 |


Otros manuales para este modelo:
Cine en casa - DAV-LF1 (4.11 mb)
Cine en casa - DAV-LF1 (4.24 mb)
Cine en casa - DAV-LF1 (2.58 mb)
Resumen del manual
The IR receiver is compact and easy to install. To connect the IR receiver Connect the cord of the IR receiver to the DIR-R3 jack of the surround speaker (L). IR receiver POWER DIR-R3 Notes • After connecting, the IR receiver is activated and the IR receiver of the surround speaker (L) is not activated automatically. • When using the IR receiver, install it following the guidelines of the IR receiver of the surround speaker (L). 32GB Hanging the IR transmitter and IR receiver on a wall You can hang the IR transmitter and IR receiver on a wall when: – there is an obstruction between the IR transmitter and the IR receiver. – people often pass between the IR transmitter and the IR receiver. When hanging both the IR transmitter and IR receiver, adjust the position of the IR transmitter after deciding the position of the IR receiver. Getting To hang the IR receiver on a wall 1 Install a commercially available screw in the wall so that it protrudes 4 mm. 4 mm 2 Detach the IR receiver stand and hang it via hole on the rear side of the IR receiver on the screw. Make sure that the IR receiver does not move after installation. To hang the IR transmitter on a wall 1 Rotate the stand of the IR transmitter. IR transmitter Stand 2 Install 2 commercially available screws in the wall so that it protrudes 4 mm. Install the screws 30 mm apart. IR receiver 30 mm 4 mm IR receiver stand Tip When reattaching the IR receiver stand to the IR receiver, attach the stand so that both delta marks on the IR receiver and stand are aligned (page 17). continued 33GB 3 Hang the IR transmitter via hole on the Notes bottom of the stand on the screw. Make sure that the IR transmitter does not move after installation. IR transmitter Stand Tip You can store the cords in the troughs in the bottom of the stand. Stand Troughs • Use screws suitable for the material and strength of the wall. • Do not install the IR transmitter or IR receiver to a wall of low strength. • Sony is not liable for any damage or accident incurred by incorrect installation (i.e. low strength wall, etc.), incorrect use of this product, or natural disaster. • When connecting/disconnecting cords, detach the IR transmitter or IR receiver from the wall first. 34GB Step 6: Performing the Quick Setup After completing the first 4 steps, make initial settings using the Quick Setup. You can set the initial setting of [LANGUAGE SETUP], [ROOM SIZE], [LISTENING POSITION], and [TV TYPE] step by step. After performing the Quick Setup, the system is ready for playing back of movies, music CDs, etc. To perform further speakers settings, see “Settings for the Speakers” on page 90. 5 Press ENTER. How to use the Quick Setup [LANGUAGE SETUP] appears. Getting LANGUAGE SETUP "/1 ENGLISH FRANCAIS DEUTSCH FUNCTION ITALIANO ESPANOL NEDERLANDS DANSK SVENSKA SUOMI PORTUGUES C/X/x/c/ ENTER O RETURN DVD Notes SETUP • The selectable language is different depending on the area. • The language you select in [LANGUAGE SETUP] is also used for [OSD], [DVD MENU], CLEAR and [SUBTITLE] (page 87). 6 Select a language using X/x, then With cover opened. press ENTER. Setting is selected and [ROOM SIZE] 1 Turn on your TV. appears. 2 Switch the input selector on the TV to this system. 3 Press "/1. 4 Press FUNCTION to select “DVD.” The guide message appears on the TV screen. ROOM SIZE SMALL FRONT: SURROUND: 1 . 6 m 1 . 6 m Note When a disc is in the system, the guide message does not appear on the TV screen. continued 35GB 7 Select a suitable room size from [SMALL], [MEDIUM], or [LARGE] using X/x, then press ENTER. Setting is selected and [LISTENING POSITION] appears. LISTENING POSITION FRONT: SURROUND: 1 . 6 m 1 . 6 m The [LISTENING POSITION] number you can select varies, depending on the [ROOM SIZE] setting. [SMALL]: Three positions [MEDIUM]: Four positions [LARGE]: Five positions 8 Select a suitable listening position using X/x, then press ENTER. Setting is selected and [TV TYPE] appears. TV TYPE 4 : 316 : 9 9 Select the TV type to connect to the system using C/c, then press ENTER. The Quick Setup is complete. When the Quick Setup is completed, the settings are saved and the guide message will not appear the next time you turn on the system. If you make a mistake Press O RETURN, then select the item again. To quit the Quick Setup Press DVD SETUP in any step. Notes • When you press CLEAR in guide message, the message disappears. When you need to change settings, select [QUICK] from [SETUP] in Setup Display (page 95). • When you select [4:3] in [TV TYPE], [4:3 LETTER BOX] is selected (page 87). • The distance and level of each speaker will be set automatically according to the selection of [ROOM SIZE] and [LISTENING POSITION] (page 90). • If you want to change each setting, see “Using the Setup Display” on page 86. • The illustrations displayed for [ROOM SIZE] and [LISTENING POSITION] are only examples and may differ from the actual room size and layout. The settings for [SPEAKER SETUP] (page 90) do not appear on the...