


Votos - 2, Puntuación media: 4
(

 )
)
|
Fotos y especificaciones Sony HT-DDW750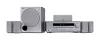 |


Otros manuales para este modelo:
Cine en casa - HT-DDW750 (149.32 kb)
Cine en casa - HT-DDW750 (1.93 mb)
Resumen del manual
You can check the remote by the indicator. Mode Indicator lights AV1 once AV2 twice To reset the remote to factory settings Press =/1, AV =/1, and MASTER VOL – at the same time. The indicator lights 3 times, then goes off. Programming the remote You can program the remote to control non- Sony components by changing the code. Once the control signals have been memorized, you can use those components as part of your system. Furthermore, you can also program the remote for Sony components that the remote is unable to control. Note that the remote can only control components that accept infrared wireless control signals. 1 Press AV ?/1 while pressing down USE MODE. The indicator lights. 2 Press the input selector button (including TV ?/1) for the component you want to control. For example, if you are going to control a CD player, press CD/SACD. 3 Press the numeric buttons to enter the numeric code (or one of the codes if more than one code exists) corresponding to the component and the maker of the component you want to control. See the tables on pages 41–43 for information on the numeric code(s) corresponding to the component and the maker of the component (the first digit and the last two digits of the numeric code correspond to the category and the maker’s code respectively.) 4 Press ENTER. Once the numeric code has been verified, the indicator slowly flashes twice and the remote automatically exits the programming mode. 40GB 5 Repeat steps 1 to 4 to control other components. To cancel programming Press USE MODE during any step. The remote automatically exits the programming mode. To activate the input source after programming Press the programmed button to activate the input source you want. If programming is unsuccessful, check the following: • If the indicator does not light up in step 1, the batteries are weak. Replace both batteries. • If the indicator flashes 4 times in quick succession while entering the numeric code, an error has occurred. Start again from step 1. Notes • The indicator turns off while a valid button is pressed. • In step 2, if several input selector buttons are pressed, only the last pressed button is valid. • In step 2, if you press TV ?/1, only TV VOL +/–, TV CH +/–, TV/VIDEO and WIDE buttons are reprogrammed. • In step 3, if an input selector button is pressed, the new input source is selected and the programming procedure returns to the beginning of step 3. • For the numeric codes, only the first three numbers entered are valid. To clear the memory of the remote To clear all programmed and learned signals, do the following to reset the remote to factory settings. Press ?/1, AV ?/1 and MASTER VOL – at the same time. The indicator flashes 3 times, then goes off. The numeric codes corresponding to the component and the maker of the component Use the numeric codes in the tables below to control non-Sony components and also Sony components that the remote is normally unable to control. Since the remote signal that a component accepts differs depending on the model and year of the component, more than one numeric code may be assigned to a component. If you fail to program your remote using one of the codes, try using other codes. Notes • The numeric codes are based on the latest information available for each brand. There is a chance, however, that your component will not respond to some or all of the codes. • All of the input selectors on this remote may not be available when used with your particular component. To control a CD player Maker Code(s) SONY 101, 102, 103 DENON 104, 123 JVC 105, 106, 107 KENWOOD 108, 109, 110 MAGNAVOX 111, 116 MARANTZ 116 ONKYO 112, 113, 114 PANASONIC 115 PHILIPS 116 PIONEER 117 TECHNICS 115, 118, 119 YAMAHA 120, 121, 122 continued Operations Using the Remote RM-PP412 41GB Programming the remote (continued) To control a DAT deck Maker Code(s) SONY 203 PIONEER 219 To control an MD deck Maker Code(s) SONY 301 DENON 302 JVC 303 KENWOOD 304 To control a tape deck Maker Code(s) SONY 201, 202 DENON 204, 205 KENWOOD 206, 207, 208, 209 NAKAMICHI 210 PANASONIC 216 PHILIPS 211, 212 PIONEER 213, 214 TECHNICS 215, 216 YAMAHA 217, 218 To control an LD player Maker Code(s) SONY 601, 602, 603 PIONEER 606 To control a video CD player Maker Code(s) SONY 605 To control a VCR Maker Code(s) SONY 701, 702, 703, 704, 705, 706 AIWA 710, 750, 757, 758 AKAI 707, 708, 709, 759 BLAUPUNKT 740 EMERSON 711, 712, 713, 714, 715, 716, 750 FISHER 717, 718, 719, 720 GENERAL ELECTRIC 721, 722, 730 GOLDSTAR 723, 753 GRUNDIG 724 HITACHI 722, 725, 729, 741 ITT/NOKIA 717 JVC 726, 727, 728, 736 MAGNAVOX 730, 731, 738 MITSUBISHI/MGA 732, 733, 734, 735 NEC 736 PANASONIC 729, 730, 737, 738, 739, 740 PHILIPS 729, 730, 731 PIONEER 729 RCA/PROSCAN 722, 729, 730, 731, 741, 747 SAMSUNG 742, 743, 744, 745 SANYO 717, 720, 746 SHARP 748, 749 TELEFUNKEN 751, 752 TOSHIBA 747, 755, 756 ZENITH 754 To control a DVD player Maker Code(s) SONY 401, 402, 403 PANASONIC 406, 408 PHILIPS 407 PIONEER 409 TOSHIBA 404 DEN...