


Votos - 3, Puntuación media: 4.7
(
 )
)
)
|
Fotos y especificaciones Sony DVP-FX750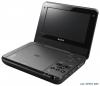 |


Otros manuales para este modelo:


Resumen del manual
. (previous)/> (next) button Skips to the beginning of the current/ next chapter, track or file. To go to the beginning of the previous chapter/track/scene, press twice. G Disc Lid (page 12) H OPEN button (page 12) Opens the disc lid. I PUSH CLOSE (page 12) Closes the disc lid. J POWER indicator (page 12) K CHARGE indicator (page 9) L (remote sensor) When operating by the remote, point it at the remote sensor . M OPERATE switch (page 12) Turns the player on or off. N HOLD switch To avoid accidental button operation of the player, set the HOLD switch to the direction of the arrow. All the buttons on the player are locked, while the buttons on the remote remain operable. O PHONES (headphone) jack A, B P USB jack (type A) (page 16) Connect a USB device to this jack. Q AUDIO OUT jack (page 11) R VIDEO OUT jack (page 11) S DC IN 9.5V jack (page 9, 10) Connect the AC power adaptor or car battery adaptor. T INPUT SELECT button (page 16) Each time you press the button, the LCD screen image switches as follows: • Disc mode (default): When playing an inserted disc. • USB mode: When playing DATA files on a connected USB device. Appears “USB” on the LCD screen when you select this mode. V V Remote The VOL +, number 5, N and AUDIO buttons have a tactile dot. Use the tactile dot as a reference when operating the player. U Number buttons Enters the title/chapter numbers, etc. • When playing a DVD VIDEO or CD or VIDEO CD: Search directly by entering the title/chapter/track number using the number buttons, and press ENTER. (Only when “PBC” is set to “Off” for VIDEO CD.) To switch a title or chapter, press C/ c. CLEAR button Clears the entry field. Displays the menu or changes the playback mode. • When playing a DVD VIDEO: Displays the top menu. • When playing a DVD VR: Switches between “Original” and “Play List” on the disc created Playlist. During playback, you cannot switch. Press x twice, and press TOP MENU. W REPLAY/ ADVANCE buttons Replays the scene/briefly fast forwards the current scene (DVD and DivX video files only). X m/M (scan/slow) buttons Fast reverses/ fast forwards when pressed during playback. Press repeatedly to change the speed. • When playing a DVD: Slow reverses/ slow forwards when pressed during pause. Press repeatedly to change the speed. • When playing a VIDEO CD or video file: Slow forwards when pressed during pause. Press repeatedly to change the speed. Depending on the disc, reverse slow playback may not be possible, or images may not appear smooth. Y ANGLE button Changes the angle. When “ ” (Angle Mark) appears, you can change angles. Depending on the disc, you may not be able to change the angle. (DVD VIDEO only) ,continued AUDIO button AUDIO button • When playing a DVD VIDEO: Each time you press the button, the language of the sound track switches. Depending on the disc, the choice of language varies. • When playing a DVD VR: Each time you press the button, the type of sound tracks recorded on a disc switches among main, sub and main/ sub sound. • When playing a CD or VIDEO CD: Each time you press the button, the mode switches between stereo and monaural (left/right). • When playing a DivX video file: Each time you press the button, the audio signal switches. If “No Audio” appears, the player does not support the audio signal. SUBTITLE button Changes the subtitle. • When playing a DVD: Each time you press the button, the subtitle switches. Depending on the disc, the choice of language varies. • When playing a DivX video file: Press the button to change the internal subtitle during playback. Press X/x and ENTER while displaying subtitle information. Preparations Preparations Accessories Check that you have the following items: • AC power adaptor (1) • Car battery adaptor (1) • Audio/video cord (mini plug . 2 y phono plug . 3) (1) • Remote (1) • R6 (size AA) batteries (2) Preparing the remote Insert two R6 (size AA) batteries by matching the 3 and # ends on the batteries to the markings inside the compartment. Charging the Rechargeable Battery Charge the rechargeable battery before using the player for the first time, or when the battery is depleted. 1 Connect the AC power adaptor. When charging begins, the CHARGE indicator lights up in orange. OPERATE ONOFF HOLD PHONES A B AU D I O OUT VIDEO OUT DC IN 9.5V DC IN 9.5V AC power Adaptor (supplied) To a wall outlet When charging ends, the CHARGE indicator lights off. Disconnect the AC power adaptor. z If the POWER indicator lights up instead of the CHARGE indicator, the OPERATE switch is set to “ON.” Set the OPERATE switch to “OFF,” and make sure that the CHARGE indicator lights up. b Charge the battery in an ambient temperature of between 5°C to 35°C. Preparations ,continued Charging time and playing time Charging time and playing time Times indicated are under the following conditions: – Moderate temperature (20°C) – Headphone use – Backlight set to minimum Depending on the ambient temperature or rechargeable battery condition, charging time may be...