


Votos - 0, Puntuación media: 0
(
 )
)
|
Fotos y especificaciones Olympus VG-180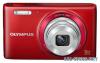 |


Otros manuales para este modelo:
Resumen del manual
The magnification ratio changes depending on the image size setting. Using the flash The flash functions can be selected to best match the shooting conditions. 1 Press I. PPFlash Auto 0.00.0 AUTOWBAUTO WB AUTOISOAUTOISO MENUMENU 16M :34 2 Use HIto select the settingoption, and press the Qbutton to set. Option Description Flash Auto The flash fires automatically in low-light or backlight conditions. Redeye Pre-flashes are emitted to reduce the occurrence of red eye in your photos. Fill In The flash fires regardless of the available light. Flash Off The flash does not fire. 10 EN Using the self-timer After the shutter button is pressed all the way down, the picture is taken after a short delay. 1 Press G. PP 1212 22 YOff MENUMENU 0.00.0 AUTOWBAUTO WB AUTOISOAUTOISO 16M :34 2 Use HIto select the settingoption, and press the Qbutton to set. Option Description Y Off The self-timer is deactivated. Y 12 sec Y 2 sec The self-timer lamp blinks for approx. 2 seconds, and then the picture is taken. The self-timer lamp turns on for approx. 10 seconds, then blinks for approx. 2 seconds, and then the picture is taken. To cancel the self-timer after it starts Press the .button. EN 11 Shooting screen displays 1 No. Name Normal Detailed No info. 1 Shooting mode R R – 2 Flash R R – 3 Self-timer R R R 4 Exposure compensation R R – 5 White balance R R – 6 ISO sensitivity R R – 7 Image size (still images) R R – 8 Aspect R R – 9 Recording with sound R R – 10 Image size (movies) R R – 11 Movie recording length R R – 12 Movie recording icon R R – 13 World time – R – 14 Date stamp R R – 15 Compression R R – 16 Number of storable still pictures R R – 17 Current memory R R – 18 Battery check R R – 19 AF target mark R R R 20 Grid Guide – R – 21 Aperture value R R R 22 Shutter speed R R R 23 Camera shake warning R R R 20 19 18 F2.8F2.81/1001/100zz0:00:340:00:3444NORMDate0.00.0AUTOWBAUTOWBAUTOISOAUTOISO16MPP:341315161714101221222311 2 3 4 5 6 7 8 9 When the shutter button is pressed halfway down Switching the displays The displays change in the order of Normal > Detailed > No info. each time F(INFO) is pressed. 12 EN Selecting the shooting mode The default settings of the function are highlighted in . Shooting mode Submode P (P mode) – M (M mode) – N (DIS Mode) – Q (Q mode) Recommended/Set 1/Set 2/ Set 3 a (Super Macro mode) – ...(.mode) BPortrait/FLandscape/ GNight Scene/ MNight+Portrait/CSport/ NIndoor/WCandle/ RSelf Portrait/SSunset/ XFireworks/VCuisine/ dDocuments/ qBeach & Snow/.Pet P (P mode) Pop Art/Pin Hole/Fish Eye/ Soft Focus/Punk/Sparkle/ Watercolor/Reflection/ Miniature n (Movie mode) – . “List of settings available in each shooting mode” (p. 44), “List of .settings” (p. 45), “List of P settings” (p. 47) 1 Press Hof the arrow pad onstandby mode screen first, and press HIto select shootingmode. To select the Q, .and P submodes, display submodes by using Gfirst. Then use HIto select the desired submode and press the Abutton. 16M :34 To select a submode 16M:3416M0:00:340:00:3444NORM:34Icon indicating the submode that is set EN 13 Learning about the shooting modes P(Pmode) The camera will select the appropriate aperture value and shutter speed for the subject. Changes can also be made to various shooting settings, such as exposure compensation, as needed. M(Mmode) The camera will automatically select the optimal shooting mode for the scene. The shooting condition is decided by the camera and settings cannot be changed, excepting some functions. N (DIS mode) This mode enables the user to reduce blur that is caused by camera shake and subject movement. a (Super Macro mode) This enables shooting as close as 5 cm (2 in.) to the subject. The zoom position is locked. .(.mode) You can shoot with the best mode for the subject and shooting scene. The best shooting settings for various scenes are pre-programmed as submodes. Note that functions may be limited in some modes. Refer to the descriptions displayed on the submode selection screen, and select the desired submode. P(Pmode) You can shoot with special effects. Refer to the sample images displayed on the submode selection screen, and select the desired submode. The best shooting settings for each effect are pre-programmed, so some function settings cannot be changed. n (Movie mode) You can shoot a movie. “Shooting movies” (p. 18) 14 EN Viewing images 1 Press the q button. Number of frames/ Total number of images 12:30’13/02/26’13/02/2612:304/304/30 Playback image 2 Use HIto select an image. Displays Displays previous next image image . Hold Ito fast forward and hold Hto reverse. . Press the q button again to return to the shooting screen. Index view and close-up view Index view enables quick selection of a desired image. Close-up view (up to 10. magnification) allows checking of image details. 1 Press the zoom buttons. 4/304/30WT12:30’13/02/26’13/02/2612:30Single-image view W T 4/304/3012:30’13/02/26’13/02/2612:30Close-up view ’13/02/2612:30Index view To select an image in index vie...
Otros modelos de este manual:Cámaras - VG‑180 (1.91 mb)