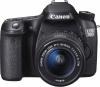
Manual de usuario Canon, modelo EOS 70D
Otros manuales para este modelo:
Resumen del manual
..To use EOS Remote, a smartphone on which iOS or Android installed is necessary. For information on supported operating system, refer to the download site of EOS Remote software. Using Camera Access Point Mode to Establish a Connection The camera and smartphone can be directly connected via a wireless LAN. Because the camera acts as an access point, no other access point is necessary, so you can establish communications easily even when you are out. To establish connection, operations on the smartphone are required. For details, refer to the smartphone instruction manual. 1 Select [Wi-Fi function]. ..Under the [53] tab, set [Wi-Fi] to [Enable], then select [Wi-Fi function]. 2 Select [q]. ..Select [q] (Connect to smartphone) and press <0>. 3 Select [Camera access point mode]. ..Press the key to select [Camera access point mode], then press <0>. ..Select [OK] and press <0> to go to the next screen. 4 Select [Easy connection]. ..Press the key to select [Easy connection], then press <0>. ..Select [OK] and press <0> to go to the next screen. 25 Using Camera Access Point Mode to Establish a Connection 5 Connect the smartphone to the camera. ..On the Wi-Fi settings menu of the smartphone, select the SSID (network name) displayed on the camera’s LCD monitor. ..For the password, enter the encryption key displayed on the camera’s LCD monitor. • The next screen may be automatically displayed even when the operation on the smartphone is not completed. 6 Start EOS Remote on the smartphone. ..When the Wi-Fi settings are completed, start EOS Remote on the smartphone. 7 Select [Camera Connection] on the smartphone. ..Select [Camera Connection] on EOS Remote. 8 Select the target camera on the smartphone. ..Select the camera to connect to from the [Detected Cameras] on EOS Remote. • Pairing starts. Using Camera Access Point Mode to Establish a Connection Non-ASCII characters are displayed as 8. 9 Connect to the camera. ..When pairing is completed, the screen on the left is displayed. Press the key to select [OK], then press <0>. 10 Perform further settings. ..To finish settings in this stage, press the key to select [OK], then press <0> to go to step 11. ..To change the name of the settings, select [Settings name] and press <0>. • The virtual keyboard is displayed (p.10). Up to 30 characters can be entered for the name of the settings. 11Save the settings. ..Select [OK] and press <0> to save the settings. • The [qConnection] screen will be displayed. ..To return to the menu, press the button. The settings for communicating with a smartphone are now complete. 27 Operating the Camera Using a Smartphone You can use a smartphone with EOS Remote installed to view images stored in the camera and shoot remotely. EOS Remote Main Screen The main functions of EOS Remote are described below. Touch the screen to learn the operation procedures. [Camera Image Viewing] ..Images stored in the camera can be viewed. ..Images stored in the camera can be saved on a smartphone. ..Operations such as deletion can be performed on images stored in the camera. [Remote Shooting] ..The camera’s Live View image can be viewed using a smartphone. ..Camera settings can be changed. ..You can shoot using remote operation. (Settings button) ..Use this button to access various settings for EOS Remote. Shooting may not be possible when the camera is connected to a smartphone. When you perform remote shooting, set the Live View shooting/Movie shooting switch to . Operating the Camera Using a Smartphone Terminating the Connection 1 Select [Exit]. ..If the screen on the left is not displayed, select [Wi-Fi function] under the [53] tab. ..Select [Exit] and press <0>. 2 Select [OK]. ..Press the key to select [OK], then press <0> to terminate the connection. ..JPEG and RAW images are resized and saved as JPEG images in the most appropriate format for smartphones. ..Although movies are included in the list, they cannot be saved. ..If the camera’s auto power off is activated during the wireless LAN connection, the wireless LAN function will turn off. Wireless LAN connection is restored when the camera wakes up from auto power off. 29 Reconnecting The camera can reconnect to a smartphone for which connection settings have been registered. 1 Select [Wi-Fi function]. ..Under the [53] tab, set [Wi-Fi] to [Enable], then select [Wi-Fi function]. 2 Select [q]. ..Select [q] (Connect to smartphone) and press <0>. 3 Establish a connection. ..Select [Connect] and press <0>. ..On the confirmation screen, select [OK]. • The camera will reconnect to the smartphone. ..When settings for multiple connection destinations are registered, select [Choose set.], select the connection destination, then connect to the destination. MEMO 31 MEMO 32 MEMO 33 MEMO 34 MEMO 35 CANON INC. 30-2, Shimomaruko 3-chome, Ohta-ku, Tokyo 146-8501, Japan U.S.A. CANON U.S.A. INC. For all inquires concerning this product, ...