


Votos - 3, Puntuación media: 3.3
(


 )
)
|
Fotos y especificaciones Garmin GPSMAP 6008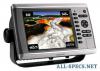 |


Resumen del manual
Note: Depth shading is available with a preprogrammed BlueChart g2 Vision data card. 1. From the Home screen, select Charts > Navigation Chart > Menu > Chart Setup > Chart Appearance > Safety Shading. 2. Select a depth. Areas with depths shallower than the specified value are shaded in blue, while areas with depths greater than the specified value are shaded in white. The contour is always drawn at, or deeper than, the selected depth. Showing and Configuring Navaid Symbols You can show and configure the appearance of navaid symbols on the Navigation chart or the Fishing chart. Note: The Fishing chart is available with a preprogrammed BlueChart g2 Vision data card. 1. From the Home screen, select Charts. 2. Complete an action: • Select Navigation Chart > Menu > Chart Setup > Chart Appearance > Symbols. • Select Fishing Chart > Menu > Chart Setup > Chart Appearance. 3. Complete an action: • Select Navaid Size to set the size of the navaid symbols shown on the map. Select a size. • Select Navaid type > NoAA to show the NOAA navaid symbol set on the map. • Select Navaid type > IALA to show the IALA navaid symbol set on the map. Showing Additional Chart Details You can show additional information on the Navigation chart. 1. From the Home screen, select Charts > Navigation Chart > Menu > Chart Setup > Chart Appearance > Symbols. 2. Complete an action: • Select Land PoIs > on to show land-based points of interest (POIs). • Select Light Sectors to show the sector in which a navigational light is visible. Select on to show light sectors at all times, or select Auto to allow the chartplotter to automatically filter out light sectors depending on the zoom level. • Select Chart Borders > on to show the area the maps cover when using a BlueChart g2 Vision data card. • Select Photo Points > on to show camera icons when using a BlueChart g2 Vision data card. This enables you to view aerial photos of landmarks (page 26). GPSMAP® 6000/7000 Series Owner’s Manual Charts and 3D Chart Views Showing Marine Service Points From the Home screen, select Charts > Navigation Chart > Menu > Chart Setup > Service Points > on. Showing and Configuring Roses On the Navigation chart or the Fishing chart, you can show a compass rose around your boat, indicating compass direction. True wind direction or apparent wind direction appears if the chartplotter is connected to a compatible marine wind sensor. Note: The Fishing chart is available with a preprogrammed BlueChart g2 Vision data card. 1. From the Home screen, select Charts. 2. Select Navigation Chart or Fishing Chart. 3. Select Menu > Chart Setup > Roses. 4. Select a type of rose (Compass, true Wind, or Apparent Wind). Compass rose Wind direction indicator Showing Other Vessels See “Configuring the Appearance of Other Vessels” (page 66). Showing and Configuring Data Bars See “Data Bars” (page 62). Using Waypoints See “Waypoints” (page 34). Using Tracks See “Tracks” (page 39). GPSMAP® 6000/7000 Series Owner’s Manual Charts and 3D Chart Views Automatic Identification System The Automatic Identification System (AIS) enables you to identify and track other vessels. About AIS AIS alerts you to area traffic. When connected to an external AIS device, the chartplotter can show some AIS information about other vessels that are within range, that are equipped with a transponder, and that are actively transmitting AIS information. The information reported for each vessel includes the Maritime Mobile Service Identity (MMSI), the location, the GPS speed, the GPS heading, the time that has elapsed since the last position of the vessel was reported, the nearest approach, and the time to the nearest approach. AIS target Dangerous AIS target Tracking AIS target Closest point and Lost time of approach to dangerous dangerous target AIS target Lost AIS target AIS Targeting Symbols AIS Targeting on the Navigation Chart Symbol Description AIS vessel. The vessel is reporting AIS information. The direction in which the triangle is pointing indicates the direction in which the AIS vessel is moving. Target has been selected. Target has been activated. The target appears larger on the chart. A green line attached to the target indicates the heading of the target. The MMSI, speed, and direction of the vessel appear beneath the target, if the details setting has been set to Show (page 17). If the AIS transmission from the vessel is lost, a message banner appears. Target has been lost. A green X indicates that the AIS transmission from the vessel has been lost, and the chartplotter displays a message banner asking whether the vessel should continue to be tracked. If you discontinue vessel tracking, the lost target symbol disappears from the chart or the 3D chart view. Dangerous target in range. The target flashes while an alarm sounds and a message banner appears. After the alarm has been acknowledged, a solid red triangle with a red line attached to it indicates the location and the heading of the target. If the saf...
Otros modelos de este manual:navegadores GPS y receptores - GPSMAP 190-01120-00 (4.88 mb)
navegadores GPS y receptores - GPSMAP 6012 (4.88 mb)
navegadores GPS y receptores - GPSMAP 6208 (4.88 mb)
navegadores GPS y receptores - GPSMAP 6212 (4.88 mb)