


Votos - 1, Puntuación media: 4
(

 )
)
|
Fotos y especificaciones Sony NW-E75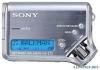 |


Otros manuales para este modelo:
Resumen del manual
Stop: Displays . Search track: Displays > or .. Fast-forward/Fast-rewind: Displays M or m. • Title: Title display mode When the music title includes more than 12 characters, the title will be automatically scrolled. Title/Artis • Track info: Track information display mode The track title, CODEC, and bit rate are displayed. When the information includes more than 12 characters, the information will be automatically scrolled. Title/Codec/ While searching, fast-forwarding, or fast-rewinding a track, the current playing position is displayed. Advanced Operations continued Changing the display mode (continued) Selecting the group display mode For any menu mode, you can select the group display by pressing the GROUP button. GROUP button 1 Press the MENU button. The menu screen is displayed. The non-Canadian model is illustrated. Gro pMode ode Shuttle switch Press (Confirm) Nx button MENU button to (+/>) to (./–) REPEAT MODE> 2 Rotate the Shuttle switch to select “DISPLAY >” and press the Nx button to confirm. The selected display mode blinks. LapTime 3 Rotate the Shuttle switch to select a desired display mode and press the Nx button to confirm. The display switches to the selected display mode. To cancel the group mode Press the GROUP button in the group mode screen. Note The display automatically returns to the normal playback screen if you do not operate any button for 30 seconds. DISPLAY> 4 Press the MENU button. The display returns to the normal screen. To cancel the menu mode Select [RETURN] in the menu screen or press the MENU button. Note The display automatically returns to the normal playback screen if you do not press any buttons for 60 seconds. Adjusting treble and bass (Digital sound preset) You can adjust the treble and bass. You can preset two settings, which can be selected during playback. Selecting the Sound quality Default settings Sound SOUND 1 SOUND 2 SOUND OFF quality (S1) (S2) (NORMAL SOUND) Bass +1 +3 ±0 Treble ±0 ±0 ±0 Gro pMode REPEAT/ SOUND button Adjusting the sound quality You can adjust the sound quality of bass and treble parts. Sound quality Emphasis level Bass -4 to +3 Treble -4 to +3 You can preset desired sound quality settings as “Sound 1” and “Sound 2.” While playing music, you can assign a preset sound quality to music. Advanced OperationsGro pMode ode Shuttle switch Press (Confirm) Nx button MENU button to (+/>) to (./–) 1 Press the MENU button. The menu screen is displayed. REPEAT MODE> The non-Canadian 2 Rotate the Shuttle switch to select model is illustrated. “SOUND >” and press the Nx button to confirm. SOUND:2> Press and hold the REPEAT/SOUND button for half a second. The Sound quality setting is changed as follows: S1 S2 (none) To return to the normal Sound quality Select “SOUND OFF.” continued Adjusting treble and bass (Digital sound preset) (continued) 3 Set the tone for “SOUND 1.” 1 Rotate the Shuttle switch to select “SOUND 1 >” and press the Nx button to confirm. 2 “BASS:+1” appears, rotate the Shuttle switch to adjust the emphasis level of bass sound and press the Nx button to confirm. 3 “TREBLE: 0” appears, rotate the Shuttle switch to adjust the emphasis level of treble sound and press the Nx button to confirm. 4 Press the MENU button The display returns to the normal screen. To adjust the “SOUND 2” setting Select “SOUND 2” in step 3. To cancel the menu mode Select [RETURN] in the menu screen or press the MENU button. Locking the controls (HOLD) You can protect your Network Walkman against accidental operation by using the HOLD function when carrying it. Gro pMode The non-Canadian model is illustrated. HOLD switch Slide the HOLD switch in the direction of the arrow. All operation buttons are disabled. If you press buttons while the HOLD switch is on, “HOLD” blinks in the display. To release the HOLD function Slide the HOLD switch in the opposite direction of the arrow. Storing non-audio data You can transfer data from the hard disk of your computer to the built-in flash memory using Windows Explorer. The built-in flash memory is displayed in Windows Explorer as an external drive (for example: as the D drive). Notes • You cannot operate the SonicStage software while operating the data storage function of your Network Walkman to use files stored in the built-in flash memory. The error message “Cannot access the Device/ media.” will be displayed when you try to operate both of them simultaneously. • If you store a lot of non-audio data into the built-in flash memory, the space for audio data is reduced by the same amount. Advanced Operations Adjusting the settings of your Network Walkman Adjusting the settings of your Network Walkman Adjusting the time setting of your Network Walkman to a computer’s built-in clock If the function is set to “ON,” the time setting of your Network Walkman is automatically adjusted to the computer’s built-in clock when your Network Walkman is connected and audio file transferring is executed (the SonicStage software must be started)....
Otros modelos de este manual:Jugadores - NW-E55 (528.36 kb)