


Votos - 4, Puntuación media: 4.3
(

 )
)
|
Fotos y especificaciones Kodak Z1275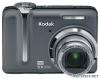 |


Resumen del manual
Follow the on-screen instructions. CRV3 lithium (non-rechargeable) Ni-MH (rechargeable) 2 AA (rechargeable or non-rechargeable) to change. OKto accept. to change. OKto accept. Language: Date/Time: for previous/next field. 3PicturesVideos131Press the Shutter button halfway to focus and set exposure. When the Ready light turns green, press the Shutter button completely down. 22Press the Shutter button completely down and release. To stop recording, press and release the Shutter button again. Framing marksReady light 12for previous/next picture/video. Press Review. (Press again to exit.) Play2X, 4X reverse2X, 4X forwardVideos: ReviewPause/unpauseOK For a true HDTV experience on your television, dock your camera on the optional Kodak EasyShare HDTV dock. Visit Kodak EasyShare printerdock or camera dock(May be sold separately.) For dock compatibility, visitTo purchase accessories, visitor z1285accessories. To use an EasyShare dock, see its user documentation. USB cableTurn on camera.3Connect USB cable. 1Turn off camera. Kodak EasyShare software opens on your computer and prompts you through the transfer process. 2USB cable U-8 Congratulations! You have: • set up your camera • taken pictures • transferred pictures to your computerVisit or Z1285support and for: • the extended user guide • interactive troubleshooting and repairs • interactive tutorials• FAQs • downloads• accessories • printing information • product registrationKeep learning! Finish reading this book, so you can take and share your best pictures! Front view 10213456789 1 Mode dial 6 Self-timer/Burst button 2 Shutter button 7 Flash 3 Self-timer/Video light 8 Speaker 4 On/Off button 9 Microphone 5 Flash button 10 Lens Back view 8101112131415161797654321 1 LCD 10 USB, A/V Out 2 OK/ 11 DC-In, for optional 3V AC adapter 3 Ready light 12 Share button 4 LCD/Info button 13 Menu button 5 Delete button 14 Review button 6 Wide angle (W) button 15 Battery compartment 7 Telephoto (T) button 16 Tripod socket 8 Strap post 17 Dock connector 9 Slot for optional SD/SDHC or MMC card 1Taking better pictures/videos Capture modes Choose the mode that best suits your subjects and surroundings. Capture mode For Smart Scene General picture taking. When the Shutter button is pressed halfway, faces are detected, the scene is analyzed, and the best settings are applied. P/M P, M Program, Manual modes for more creative control. (See page 19). ISO High ISO People in low-light scenes indoors using a higher ISO. Digital Image Stabilization Minimizing the effects of camera shake and subject movement. SCN Scene Point-and-shoot simplicity when taking pictures under special conditions. Video Capturing video with sound. (See page 3.) Favorites Viewing favorite pictures. Using optical zoom Use optical zoom to get up to 5X closer to your subject while taking pictures/videos. Optical zoom is effective when the lens is no closer than 24 in. (60 cm) to the subject or 7.9 in. (20 cm) in Close-up mode. Zoom indicatorOptical zoom rangeDigital zoom range WTD 1Press Telephoto (T) to zoom in. Press Wide Angle (W) to zoom out. The zoom indicator shows zoom status. 2Take the picture or video. Using digital zoom Use digital zoom to get up to 5X beyond optical zoom while taking pictures. Press Telephoto (T) to the maximum optical zoom. Release the button, then press it again. NOTE: You may notice decreased image quality when using digital zoom. The slider on the zoom indicator turns red when the picture quality reaches the limit for an acceptable 4 x 6-in. (10 x 15 cm) print. Using the flash Use the flash when you take pictures at night, indoors, or outdoors in heavy shadows. Press the button repeatedly to scroll through flash modes. (See flash modes below.) Flash modes Flash fires Auto When the lighting conditions require it. Fill Every time you take a picture, regardless of the lighting conditions. Use when the subject is in shadow or is “backlit” (when the light is behind the subject). In low light, hold the camera steady or use a tripod. Red-eye If Red-eye Pre-flash is turned off: The flash fires once and the camera automatically corrects red-eye in the picture. If Red-eye Pre-flash is turned on: The flash fires once so the eyes become accustomed to the flash, then fires again when the picture is taken. Off Never. Flash-to-subject distance Wide angle: 2–19.3 ft (0.6–5.9 m) @ ISO 400 Telephoto: 2–10.5 ft (0.6–3.2 m) @ ISO 400 Using the self-timer Use the self-timer when you want to be included in a picture, or to ensure a steady Shutter button press. 12Place camera on a tripod or flat surface. Compose the scene. Press the Shutter button halfway, then completely down. • Once for a 10-second delay (so you have time to get into the scene) • Again for a 2-second delay (for a steady, auto-shutter release on a tripod) • Again for 2-shot (one pictu...
Otros modelos de este manual:Detector de incendios - Z1285 (3.61 mb)