


Votos - 4, Puntuación media: 4.3
(

 )
)
|
Fotos y especificaciones Samsung SC7555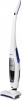 |


Otros manuales para este modelo:

Resumen del manual
To unplug, grasp the plug, not the cord. • Do not mutilate or incinerate batteries as they will explode at high temperatures. • Do not attempt to open the charger. Repairs should only be carried out by a qualified customer care centre. • Do not expose the charger to high temperatures or allow moisture or humidity of any kind to come into contact with the charger. STICK VACUUM CLEANER • Do not pick up hard or sharp objects such as glass, nails, screws, coins, and etc. • Do not use without a filter in place. When servicing the unit, never put fingers or other objects into the fan chamber in case the unit accidentally turns on. • Do not put any objects into openings. Do not use with any openings blocked; keep openings free of dust, lint, hair, and anything that may reduce air flow. • Do not pick up toxic materials (chlorine bleach, ammonia, drain cleaner, etc.). • Do not pick up anything that is burning or smoke, such as cigarettes, matches, or hot ashes. • Do not use to pick up flammable or combustible liquids such as gasoline, nor use on areas where they may be present. • Do not use STICK vacuum cleaner in an enclosed space filled with vapours given off by oil based paint, paint thinner, moth proofing substances, flammable dust, or other explosive or toxic vapours. • Leaks from battery cells can occur under extreme usage or temperature conditions. If the liquid gets on skin, wash quickly with water. If the liquid gets into the eyes, flush them immediately with clean water for a minimum of 10 minutes. Seek medical attention. safety information _03 contents ASSEMBLING THE CLEANER OPERATING THE CLEANER MAINTAIN TOOLS AND FILTER TROUBLESHOOTING Assembling the cleaner Assembling the handle and the main body Assembling the main body and the power brush Assembling the main body and the handy cleaner Charging About the battery Using the stick cleaner Using the power brush Using the handy cleaner Using the crevice / dusting Emptying the dust bin Cleaning the filter Countermeasure to remove anything clogging the cleaner 05 07 07 07 08 09 10 10 10 11 11 13 14 04_ contents assemoinq tne cleaner -W- ASSEMBLING THE CLEANER assembling _05 01 ASSEMBLING assemoinq tne cleaner -W- Check the contents of the package. 06_ assembling ASSEMBLING THE HANDLE AND THE MAIN BODY Insert the guiding parts of the handle as far as possible into the hole of the main body, insert the guide key into the holes of the handle and then fasten the screw with the (+) screw driver. ASSEMBLING THE MAIN BODY AND THE POWER BRUSH Insert the connector of the power brush into the hole of the main body until it clicks into place. ASSEMBLING THE MAIN BODY AND THE HANDY CLEANER Insert the air inlet of the handy cleaner into the air inlet of the main body and then push the handy cleaner into the main body until it clicks into place. assembling _07 01 ASSEMBLING assemblinq the cleaner -W- CHARGING_ 1. Install the charger on a flat surface and then plug the power cable. 2. Turn the power buttons of the main body and the handy cleaner off. • The battery does not charge when the power button is on. 3. Connect the handy cleaner to the main body. (When the main body and the handy cleaner are not assembled, the stick cleaner does not work.) 4. Install the cleaner with the charger aligning the charge pins of the cleaner with the charge terminals of the charger. • The charging lamp is turned on and blink regularly. 5. While charging, the charge lamp is turned on. If the cleaner is separated, the lamp is turned off. • Even if charging is complete, the lamp does not turn off or change to brighter blue color. This is not a problem with the product. • Make sure to turn both power buttons ‘Off' and then charge the battery. 08_ assembling Charge the product in the following cases. - When using the product for the first time after purchasing it or after not using it for a long period. - When the battery level is low and the suction power is weak. When you charge the cleaner after purchasing or using it, charge the product for approximately 4 hours before using it. To charge the battery fully when the battery is discharged takes approximately 4 hours. If you separate the cleaner from the charger, the battery is naturally discharged. - It is recommended that you keep the cleaner connected to the charger. (However, if you are going on a business trip or holiday, disconnect the power cord of the charger from the wall outlet.) NOTE ABOUT THE BATTERY_ • The powerful Li-Ion battery has been used. • The warranty for the battery is 6 months from the time of purchase. • To purchase a new battery, please contact the service center. • Since this battery is only for this cleaner, do not use it for other appliances or purposes. • Do not disassemble or modify the product. • Charge the product in a well-ventilated location. • Do not expose the battery to heat or fire. • Do not connect metal objects to...
Otros modelos de este manual:Aspiradoras - SS7550 (6.23 mb)
Aspiradoras - SS7555 (6.23 mb)