


Votos - 0, Puntuación media: 0
(
 )
)
|
Fotos y especificaciones NETGEAR WN1000RP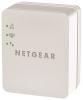 |


Otros manuales para este modelo:
Resumen del manual
. . . . . . . . . . . . . . . . . . . . . . . . . . . . . . . . . . . . 3 Getting Started. . . . . . . . . . . . . . . . . . . . . . . . . . . . . . . . . . . . . . . . . 5 Place the WiFi Booster . . . . . . . . . . . . . . . . . . . . . . . . . . . . . . . 5 Connect the WiFi Booster . . . . . . . . . . . . . . . . . . . . . . . . . . . . . 6 WiFi Booster Performance. . . . . . . . . . . . . . . . . . . . . . . . . . . . . . . 14 When to Use the WiFi Booster . . . . . . . . . . . . . . . . . . . . . . . . . . . 16 Frequently Asked Questions . . . . . . . . . . . . . . . . . . . . . . . . . . . . . 17 2 Hardware Features The LEDs on the front show how the WiFi Booster is working. Link Rate Status Link Rate This LED indicates a wireless connection between the WiFi Booster and the router. • Green is best. • Amber is good. • Red is poor. Status This LED is lit when the WiFi Booster is powered on. WiFi Device to Booster This LED is lit when the WiFi Booster is connected to a computer or wireless device. On/Offbutton WPS button WiFi Device to Booster Factory Resetbutton 3 The side panel has the following features: • On/Off button. Turns the device on and off. • WPS button. Press the WPS button to wirelessly connect the WiFi Booster to your router or wireless adapter. All LEDs blink when the WPS procedure starts. The bottom panel has the Factory Reset button.To use this button, insert a paper clip into the reset hole and hold it until the Status LED blinks. Then wait for the booster to reboot. 4 5 Getting Started The WiFi Booster extends the wireless network to include the area outside the range of your existing WiFi network. Follow these steps to correctly set up the WiFi Booster. Place the WiFi Booster 1. Place the WiFi Booster an equal distance between your router and the wireless device located outside the range of your router. Tip: Make sure that you choose a location that is within the wireless range or your router. 2. Plug the WiFi Booster into an electrical outlet, and wait one minute until the WiFi Booster starts. The Status LED turns green. DO DON’T Connect the WiFi Booster To extend the range of your WiFi network, you need to connect the WiFi Booster to your existing WiFi network. You have two options to connect the WiFi Booster to your network. Option 1: Connect with WPS (Wi-Fi Protected Setup) WPS lets you easily join a secure WiFi network without typing the network name and password. The WPS button is a physical button on the WiFi router, gateway, or access point. For more information, see page 7. If your router supports WPS (Wi-Fi Protected Setup ), NETGEAR recommends that you use Option 1; otherwise, use Option 2. Tip: WPS does not support WEP network security. If you are using WEP security, use Option 2 to connect. Option 2: Connect with the web browser setup guide The web browser setup guide walks you through the necessary steps to connect your WiFi Booster to an existing WiFi network. For more information, see page 8. 6 Option 1: Connect with WPS (Wi-Fi Protected Setup) 1. Press the WPS button on the WiFi Booster. 2. Within two minutes, press the WPS button on your wireless router, gateway, or access point. At this point, the WiFi Booster should be connected to your existing WiFi network, and the Link Rate LED on your WiFi Booster lights. 3. The WiFi Booster’s wireless network name (SSID) changes to your existing WiFi network name, with _EXT at the end of the name. For example: Existing WiFi network name: MyNetworkName New WiFi Booster network name: MyNetworkName_EXT 4. Now connect your existing WiFi devices to the new WiFi Boosternetwork (MyNetworkName_EXT). Use the same networksecurity key (passphrase) as is set on your existing WiFinetwork/WiFi router. 7 Option 2: Connect with web browser setup guide 1. Once the WiFi Booster is powered on and the Status LED is green, use a WiFi network utility on a wireless device to find and connect to NETGEAR_EXT (SSID) wirelessnetwork. Tip: You can use any WiFi network utility on a laptop, tablet, or smartphone to find and connect to the WiFi Booster wireless network. 8 After the connection with the wireless device is established, the WiFi Device to Booster LED turns green. Next, you need to connect the WiFi Booster to your existing WiFi network. 2. Open a web browser window from the same wireless device. The browser takes you directly to the onscreen setup guide. Tip: You can always access the WiFi Booster settings again by typing in your browser URL bar. Note that you must be connected to the WiFi Booster/extended network for the setup guide to display. 9 3. Select the existing WiFi network you would like to extend, andclick Continue. 4. Type the network passphrase/network key in the PassPhrase field, and click Continue. 10 5. Type the name (SSID) for your new WiFi Booster/extended network in the 2.4GHz Network Name (SSID) field, and click Continue. Note: You can change the SSID and wireless passphrase or use the same security settings ...