


Votos - 3, Puntuación media: 4.3
(

 )
)
|
Fotos y especificaciones HTC Touch Diamond2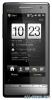 |


Resumen del manual
Changing the MMS settings Check your device to see if it is preconfigured with your wireless service provider’s MMS settings. Add the MMS settings of your wireless service provider if there are no preset MMS settings found on your device. To configure MMS message settings 1. Tap Start > All Programs > Messaging > SMS / MMS. 2. Tap Menu > MMS Options. The Settings screen then appears. 3. In the Preferences tab, choose from the available options according to your needs. 4. Tap the Servers tab and check if your device is preset with MMS server settings. If there are no preset settings, tap New and enter the MMS settings which you obtained from your wireless service provider. Note If your device already has preset MMS settings, it is recommended that you do not change these settings. If you change the preset settings, your device may not be able to send and receive MMS messages. 5. Tap Done. Note If you add several MMS message service providers to the Settings screen, you can choose one as your default provider. Select the provider's name in the list, then tap Set As Default. Creating and sending MMS messages You can compose MMS messages in a combination of slides, where each slide can consist of a photo, video or audio clip, and/or text. To compose an MMS message 1. Tap Start > All Programs > Messaging > SMS / MMS. 2. Tap Menu > New > MMS. 3. When the Choose a MMS screen opens, tap a preset template, or tap Custom to open a blank MMS message. Note If you prefer to start composing from a blank MMS message every time, select the Always choose custom check box. 4. In To, enter the recipient’s phone number or e-mail address directly, or tap To, Cc, or Bcc to choose a phone number or an e-mail address from Contacts. Note You may need to scroll up to see the Cc and Bcc fields. 5. Enter a subject for your message. 6. Tap the Insert icon ( )to insert a photo or video clip. When selecting a photo or video clip, you can: • Tap the photo or video clip to insert it into the MMS message. • Tap to take a photo and insert it into the MMS message. • Tap to record MMS video and insert it into the MMS message. • Tap to quit selection and return to the MMS message. 7. Enter text and insert audio clips by tapping the respective areas. See “To add text to an MMS message” and “To add an audio clip to an MMS message” for details. 8. To add more slides, tap or tap Menu > Slides > Insert Slide. Repeat steps 5 and 6 to add photos/videos, text, and audio to your slides. 9. Tap Send to send the MMS message. Tip You can also send an MMS message from Pictures & Videos, Album, or the Camera program. To add text to an MMS message When you tap Insert text here on your MMS message, an empty screen appears where you can enter your text. You can insert the following types of information: Enter your own textChoose from common words or phrases from the My Text listInclude a Favorites linkAdd an emoticonInsert contact informationInsert calendar appointment Tip To edit or delete a phrase on the My Text list, tap and hold a string, and then tap Edit or Delete from the shortcut menu. To add a new phrase, tap New. To add an audio clip to an MMS message You can add one audio clip per slide in your MMS message. 1. Tap Insert audio on your MMS message. By default, the My Documents is shown. Tap My Music or another folder that contains audio files. When navigating folders, tap the down arrow ( ) to return to the upper folder. 2. Select an audio file. When selected, you can: • Tap to play the audio clip, to pause, or to stop playback. • Tap Select to insert it to the MMS message. • Tap to quit selection and return to your MMS message. Note To record a new audio clip and add it to your MMS message, tap . The Record pop- up window then opens. Tap Record to start recording, and Stop to end the recording. Tap Play to listen to the recorded audio clip, then tap Add. The new audio clip is then inserted to the MMS message. Viewing and replying to MMS messages To view an MMS message 1. In the SMS / MMS inbox, tap the MMS message. 2. In the threaded message, tap the MMS icon ( ), and then use the playback controls , , and to view the MMS message. 3. Tap Contents to see a list of files included in the message. On the Message Contents screen, you can do the following: • To save a file, select it, and tap Menu > Save. • To save the contents of a text file to the My Text list, tap Menu > Save into My Text. • To associate a photo to one of your contacts, tap Menu > Assign to Contact. To reply to an MMS message 1. In the SMS / MMS inbox, select the mobile phone number or name of the contact who sent you the MMS message. 2. In the threaded message, tap the MMS message to open and view an MMS message. 3. After viewing the MMS message, tap Menu > Reply > via MMS to reply with an MMS message or tap Menu > Reply > via SMS to reply with a text message. To block a phone number from sending you MMS messages If you do not want to receive MMS messages from a particular sender, you ...