


Votos - 4, Puntuación media: 4.3
(

 )
)
|
Fotos y especificaciones Zanussi FA 522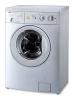 |


Resumen del manual
The bent piece has to be entered into the tube’s mouth in order to assure the support. Aforesaid piece allows the hose to be fixed to the wall by means of an opening on the upper part and that way the hose does not move and its falling is avoided. 7 ENGLISH IMPORTANT: The distance from the floor to the highest part of the hose should be between 60 to 90 cm. (It is advised to be between 60 and 70 cm). The hose must not be bent nor twisted to avoid clogging. Should a prolongation of the discharging hose be unavoidable this must never surpass 1.5 m and must be of the same diameter as the original hose. Make sure the hoses are not too tense. Levelling Level the appliance by loosening or tightening the feet. Once in the right position fix the feet by pushing the nuts against the base of the case. Accurate levelling will prevent vibration, noise and displacement of the appliance during operation. Some vibration is inevitable, especially if placed on a wooden floor. Wooden floors are particularly susceptible to vibrations. For advice, consult a builder. If posible always place the appliance on a solid floor. Electrical connections Before plugging the appliance make sure that: 1°. the mains of your installation is the same as on the rating plate of your appliance (the plate is sticked to the rear of the appliance). 2°. The meter, the fuses, the wiring and the socket outlet can support the max. power absorbed stated on the rating plate. 3°. The socket base and the plug must fit in adequately without any reducing interposition, multiple outlets or adapters. If necessary replace the socket outlet by an adequate one. The applicable rules for electrical security require an adequate earthing. The plug of the appliance is provided with such a device. Make sure your socket outlet is provided with an adquate earthing too. The manufacturer declines any liability in case of accidents or incicents should these safety measures not be observed. 8 Your new washing machine This new machine meets all modern requirements for effective treatment of laundry with low water, energy and detergent consumption. • The temperature selector dial will allow you to choose the most suitable temperature for your laundry. Description of the appliance 1 Detergent dispenser drawer 2 Programme chart 3 Control panel 4 Door handle 5 Drainage area door 6 Adjustable feet 6 Detergent dispenser drawer ID Prewash uu Main wash ^ Fabric softener, starch 9 ENGLISH Use Control panel 1. Programme chart It will help you to choose the most suitable washing programme for your laundry. 2. RINSE HOLD button O (Easy iron. If you use this button it will be easier to iron the fabrics later). Pressing this button together with the programs for delicate fabrics, the water will hold up in the wash tub at the end of the cycle. Press again to drain the water and take out the clothes. 3. № button Pressing this button before starting the intense program there will be one rinse less which leads to energy and water saving. 4. On/off lamp It lights when the appliance is operating. ®®® © ® 5. Temperature selector - This control allows you to select the temperature of the washing cycle in accordance with the kind of clothes to be washed. Turn the control until the required temperature coincides with the marker. On the program table you will find the most apropriate temperature for each kind of washing. Selecting -X-any program can be run through with cold water. This will ensure a saving in electricity consumption. 6. Program selector loo To select the required program turn the control clockwise until the marker on the top coincides with the letter of the required program (reference mark on the control panel). If at any chance you pass by the required letter NEVER TURN THE CONTROL ANTICLOCKWISE just continue clockwise until the required letter is reached again. 10 CD Washing hints Sorting the laundry Follow the wash code symbols on each garment label and the manufacturer’s washing instructions. Sort the laundry as follows: whites, coloureds, synthetics, delicates, woollens. Temperatures 90° for normally soiled white cottons and linen (e.g. tea cloths, towels, tablecloths, sheets...) 60° for normally soiled, colour fast garments (e.g. shirts, night dresses, pyjamas....) in linen, cotton or synthetic fibres and for lightly soiled white cotton (e.g. underwear). ■X" (cold)for delicate items (e.g. net curtains), mixed 30°-40° laundry including synthetic fibres and woollens. Before loading the laundry Never wash whites and coloureds together. Whites may lose their “whiteness” in the wash. New coloured items may run in the first wash; they should therefore be washed separately the first time. Make sure that no metal objects are left in the laundry (e.g. hair clips, safety pins, pins). Button up pillowcases, close zip fasteners, hooks and poppers. Tie any belts or long tapes. Remove persistent stains before washing. Rub particu...
Otros modelos de este manual:Lavadoras - FA 622 (891.79 kb)