


Votos - 3, Puntuación media: 3.7
(

 )
)
|
Fotos y especificaciones LG 20LS1R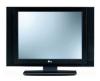 |


Resumen del manual
Retain it for future reference. Record model number and serial number of the set. See the label attached on the back cover and quote this information to your dealer when you require service. Contents Installation 3 Location and function of controls 8 Remote control handset Battery installation / Front / Rear Basic operation 14 On and off On-Screen Menu Language/Country Selection On screen menus 15 Menu selection / Programme selection Volume adjustment Setting up TV stations 16 Auto programme tuning Manual programme tuning Programme edit / Favourite programme Calling the programme table Picture adjustment 21 PSM (Picture Status Memory) Picture adjustment CSM (Colour Status Memory) XD function / Cinema / Reset Sound adjustment 25 SSM (Sound Status Memory) Sound adjustment / Stereo/Dual reception NICAM reception / Sound output selection Time Menu 27 Clock / On/Off time Auto sleep / Sleep timer Other functions 29 Child lock / XD Demo TV, AV and PC modes / Auto AV switching Teletext 32 Switch on/off SIMPLE text / TOP text FASTEXT / Special teletext functions Connection of external equipment 34 Aerial socket / Euro scart socket (VCR) Audio/Video in sockets S-Video/Audio in sockets (S-Video) DVD input sockets DTV in sockets / Headphone socket Connection of PC 37 PC in socket PC Setup Selecting wide XGA mode Picture format 40 Troubleshooting checklist 41 Product Specifications 43 Installation ENGLISH Stand Installation 1. Assemble parts of stand body with cover base of the stand. Insert stand body into a cover base until clicking sound. 2. Carefully place the product screen side down on a cushioned surface that will protect product and screen from damage. 3. Place the product stand on the product as shown. Note: Here shown may be somewhat different from your set. stand body cover base Detaching stand 1. Place the set with its front facing downward on a cushion or soft cloth. 2. Hold the stand with both hands and bend it upward. 3. Pull each side of cover base backward during pressing latch upward. 4. Hold cover base and pull with shake it backward to separate from stand body. 5. Pull stand body to separate from set during pressing 2 latches. Note: Here shown may be somewhat different from your set. 3 Installation 4 Basic connection 1. Connect the cables as necessary. To connect an additional equipment,see the Connection of external equipment section. 2. Install the Cable management as shown. Note: Here shown may be somewhat different from your set. Connection of TV 1. Connect the aerial cable to the socket marked ANTENNA IN on the back. For the best reception an outdoor aerial should be used. 2. To connect an additional equipment, see the Connection of external equipment section. 3. Connect the power cord. Note: Here shown may be somewhat different from your set. ( ) The stand won't move if you don't press release button. Unfolding the stand base 1. Place the set with its front facing downward on a cushion or soft cloth. 2. Hold down the release button inside the stand and strongly pull out the stand with your two hands. Note: Here shown may be somewhat different from your set. 5 ENGLISH Installation How to remove the Cable management First, press the cable management. Hold the Cable management with both hands and pull it upward. Note: Do not hold the CABLE MANAGEMENT when moving the product. (If the product is dropped,you may be injured or the product may be broken.) Wall Mount: Horizontal installation 4 inches 4 inches 4 inches 4 inches 4 inches R R For proper ventilation, allow a clearance of 4" on each side and from the wall. Detailed installation instructions are available from your dealer, see the optional Tilt Wall Mounting Bracket Installation and Setup Guide. For proper ventilation, allow a clearance of 4" on each side and from the wall. 4 inches 4 inches 4 inches 4 inches R Desktop Pedestal Installation Place the ring spacers on the set before installing the wall mounting bracket so that the inclination of the backside of the set can be adjusted perpendicularly. 2-Ring spacers < 20LC1R* only > Installation Positioning your display Adjust the position of the panel in various ways for maximum comfort. • Tilt range 10~12 30 Location Position your set so that no bright light or sunlight falls directly onto the screen. Care should be taken not to expose the set to any unnecessary vibration, moisture, dust or heat. Also ensure that the set is placed in a position to allow a free flow of air. Do not cover the ventilation openings on the back cover. If you intend to mount the TV to a wall, attach VESA standard mounting interface (optional parts) to the back of the TV. When you install the set to use the wall mounting bracket (optional parts), fix it carefully so as not to drop. Installation ENGLISH Kensington Security System -The TV is equipped with a Kensington Security System connector on the back panel. Connect the Kensington Security System cable as shown below. - For the detailed installation and use of the ...
Otros modelos de este manual:TV - 20LS2R (3.52 mb)
TV - 23LS2R (3.52 mb)