


Votos - 5, Puntuación media: 3.4
(


 )
)
|
Fotos y especificaciones Sony HDR-SR11E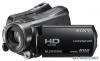 |


Otros manuales para este modelo:


Resumen del manual
7 Click [Continue]. 8 Read [License Agreement], select [I accept the terms of the license agreement] if you agree, then click [Next]. 9 Confirm the installation settings, then click [Install]. 0 Follow the on-screen instructions to install the software. Depending on the computer, you may need to install third party software. If the installation screen appears, follow the instructions to install the required software. qa Restart the computer if required to complete the installation. qs Remove the CD-ROM from the disc drive of your computer. To disconnect the USB cable 1 Click the icon t [Safely remove USB Mass Storage Device] t [OK] (Windows 2000 only) on the task tray on the bottom right of the desktop of the computer. 2 Touch [END] t [YES] on the screen of your camcorder. 3 Disconnect the USB cable. Operating the “Picture Motion Browser” To start “Picture Motion Browser,” click [Start] t [All Programs] t [Sony Picture Utility] t [PMB - Picture Motion Browser]. For the basic operation of “Picture Motion Browser,” see “PMB Guide.” To display “PMB Guide,” click [Start] t [All Programs] t [Sony Picture Utility] t [Help] t [PMB Guide]. z Tips • If the [USB SELECT] screen does not appear, touch (HOME) t (OTHERS) t [USB CONNECT]. Enjoying with a computer 27 Troubleshooting Troubleshooting If you run into any problems using your camcorder, use the following table to troubleshoot the problem. If the problem persists, disconnect the power source and contact your Sony dealer. Notes before sending your camcorder for repair • Your camcorder may be required to initialize or change the current hard disk of the camcorder, depending on the problem. In the event of this, the data stored on the hard disk will be deleted. Be sure to save the data on the internal hard disk (see “Handycam Handbook” (PDF)) onto other media (backup) before sending your camcorder for repair. We will not compensate you for any loss of hard disk data. • During repair, we may check a minimum amount of data stored on the hard disk in order to investigate the problem. However, your Sony dealer will neither copy nor retain your data. • For the symptoms of your camcorder, see “Handycam Handbook” (PDF) and for connecting to the computer, see “PMB Guide.” The power does not turn on. • Attach a charged battery pack to the camcorder (p. 8). • Connect the plug of the AC Adaptor to the wall outlet (wall socket) (p. 8). The camcorder does not operate even when the power is set to on. • It takes a few seconds for your camcorder to be ready to shoot after the power is turned on. This is not a malfunction. • Disconnect the AC Adaptor from the wall outlet (wall socket) or remove the battery pack, then reconnect it after about 1 minute. If the functions still do not work, press the RESET button (p. 17) using a pointed object (If you press the RESET button, all settings, including the clock setting, are reset). • The temperature of your camcorder is extremely high. Turn off your camcorder and leave it for a while in a cool place. • The temperature of your camcorder is extremely low. Leave your camcorder with the power of your camcorder on. Turn off the camcorder and take it to a warm place. Leave the camcorder there for a while, then turn on the camcorder. Your camcorder gets warm. • This is because the power has been turned on for a long time. This is not a malfunction. The power abruptly turns off. • Use the AC Adaptor. • Turn on the power again. • Charge the battery pack (p. 8). Pressing START/STOP or PHOTO does not record images. • Set the POWER switch to (Movie) or (Still) (p. 13). • You cannot record images in sleep mode. Press the QUICK ON button (p. 16). • Your camcorder is recording the image you have just shot on the media. You cannot make new recording during this period. • The media is full. Delete unnecessary images (p. 24). • Total number of movie scenes or still images exceeds the recordable capacity of the media. Delete unnecessary images (p. 24). The recording stops. • The temperature of your camcorder is extremely high/low. Turn off your camcorder and leave it for a while in a cool/warm place. You cannot install “Picture Motion Browser.” • Check the computer environment required to install “Picture Motion Browser.” • Install “Picture Motion Browser” in the proper order (p. 26). “Picture Motion Browser” does not work correctly. • Quit “Picture Motion Browser” and restart your computer. Your camcorder is not recognized by the computer. • Disconnect devices from the USB jack of the computer other than the keyboard, mouse, and your camcorder. • Disconnect the USB cable from the computer and the Handycam Station, and restart the computer, then connect the computer and your camcorder again in the proper order. Self-diagnosis display/Warning indicators If indicators appear on the LCD screen or in the viewfinder, check the following. If the problem persists even after you have tried to fix a couple of times, contact your Sony dealer or local authorized Sony...
Otros modelos de este manual:Videocámaras - HDR-SR12E (2.01 mb)