


Votos - 3, Puntuación media: 4.3
(

 )
)
|
Fotos y especificaciones Canon XH A1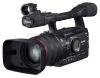 |


Otros manuales para este modelo:
Resumen del manual
• If the tape counter shows a negative value, fast forward the tape instead. • The tape stops automatically at “0:00:00” and the mark disappears. • The tape counter changes to time code. • The zero set memory may not function correctly if the time code has not been recorded consecutively. • The zero set memory function may not work correctly if you mix recordings in HDV and DV standards on the same tape. Playback 101 Index Search With the index search you can locate any point you have marked beforehand with an index signal ( 71). This function is operated with the wireless controller. SEARCH SELECT button / buttons 1. Press the SEARCH SELECT button to display “INDEX SEARCH”. appears. 2. Press the or button to begin searching. • Press more than once to search for further index signals (up to 10 times). • Press the STOP button to stop searching. • Playback may start slightly before or after the index signal. • The index search function may not work correctly if you mix recordings in HDV and DV standards on the same tape. Date Search EYou can locate the change of the date/time zone with the date search function. This function is operated with the wireless controller. SEARCH SELECT button / buttons 1. Press the SEARCH SELECT button to display “DATE SEARCH”. appears. 2. Press the or button to begin searching. • Press more than once to search for further date changes (up to 10 times). • Press the STOP button to stop searching. • A recording of longer than a minute per date/time zone is required. • The date search may not function if the data code is not correctly displayed. • The date search function may not work correctly if you mix recordings in HDV and DV standards on the same tape. Playback 103 Displaying the Data Code The camcorder maintains a data code containing the recording date and time and other camera data such as shutter speed, gain and exposure (f-stop). WL-D5000DATA CODE button MENU button MENU button SELECT/SET dial Selecting the Data Code Display Combination MENU DISPLAY SETUP/ DATA CODE••••DATE & TIME ( 25) Open the menu and select [DISPLAY SETUP/ ]. Select [DATA CODE], select a setting option and close the menu. Displaying the Data Code Press the DATA CODE button on the wireless controller. The data code will not appear the next time you turn on the camcorder. Six-Second Auto Date The date and time appear for 6 seconds when you begin playback, or to indicate that the date or time zone has changed. MENU DISPLAY SETUP/ 6SEC.DATE••••OFF ( 25) Open the menu and select [DISPLAY SETUP/ ]. Select [6SEC.DATE], set it to [ON] and close the menu. Changing the Remote Sensor Mode Two remote sensor modes and an off setting are available to prevent interference from other Canon wireless controllers being used nearby. E To change the remote sensor mode of the camcorder Change the [WIRELESS REMOTE] setting of the custom function file ( 89). To change the remote sensor mode of the wireless controller Press the ZOOM T button and keep it pressed for over 2 seconds to change the wireless controller to mode 2. Press the ZOOM W button and keep it pressed for over 2 seconds to change the wireless controller to mode 1. If you have set the camcorder to mode 1, press the ZOOM W button for mode 1. • The wireless controller returns to mode 1 when you replace the batteries. Change the mode if necessary. • Make sure that the camcorder and wireless controller are set to the same mode. Display the camcorder’s mode by pressing any button on the wireless controller (except the REMOTE SET button) and set the wireless controller’s mode to the same mode. Change the batteries if the wireless controller still does not work. Playback 105 Recording an External Video Signal (Analog Line-In, HDV/DV In) You can record on the tape an external video signal, either from the analog video input (SD standard) or from the HDV/DV input (SD or HD standard). Analog Line-In 1. Connect the camcorder to the analog video device. 4 For the connection diagram to an analog device refer to Section of Connecting to a Monitor/TV ( 99). 2. Set the dial to and load a blank cassette. 3. Open the menu and select [AUDIO SETUP]. Select [DV AUDIO], select a setting option and close the menu. 4. Connected device: Load the recorded cassette. 5. Press the and buttons (or the REC PAUSE button on the wireless controller). • The camcorder enters the record pause mode. In this mode you can monitor the picture on the screen. • If you press only the button, recording will start immediately. 6. Connected device: Play back the tape. 7. Press the button (or the PAUSE button on the wireless controller) when the scene you wish to record appears. Recording starts. 8. Press the button to stop recording. 9. Connected device: Stop playback. HDV/DV In When recording from an external digital device you can select the time code to be used for the recording made with this camcorder. Select [COPY] to keep the original time code of the video source, or [REGEN.] to use instead this camcor...
Otros modelos de este manual:Videocámaras - XH G1 (6.1 mb)