


Votos - 6, Puntuación media: 3.8
(

 )
)
|
Fotos y especificaciones Canon MVX25i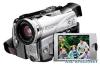 |


Resumen del manual
The battery pack may also not be charged correctly when a power outage occurs during charging. Remove the battery pack and attach it back to the camcorder. . When the power adapter or battery pack is defective, the CHARGE indicator flashes rapidly (at about 2 flashes/second) and charging stops. . The CHARGE indicator informs you about the charge status. 0-50%: Flashes once every second More than 50%: Flashes twice every second 100%: Glows steadily . Charging, Recording and Playback Times Below times are approximate and vary according to the charging, recording or playback conditions. NB-2LH NB-2L BP-2L12 BP-2L14 Charging Time 115 min. 110 min. 180 min. 210 min. Max. Recording Time Viewfinder 90 min. 70 min. 145 min. 185 min. LCD 75 min. 55 min. 120 min. 155 min. Typical Recording Time* Viewfinder 50 min. 40 min. 80 min. 100 min. LCD 40 min. 30 min. 70 min. 85 min. Playback Time 105 min. 85 min. 175 min. 220 min. * Approximate times for recording with repeated operations such as start/stop, zooming, power on/off. Actual time may be shorter. E . We recommend charging the battery pack in temperatures between 10 °C and 30 °C. Outside the temperature range of 0 °C to 40 °C, the CHARGE indicator flashes rapidly and charging stops. . A lithium ion battery pack can be charged at any charge state. Unlike conventional battery packs, you do not need to completely use or discharge it before charging. . We recommend that you prepare battery packs 2 to 3 times longer than you think you might need. . To conserve battery charge, turn off the camcorder instead of leaving it in record pause mode. Basic Preparations 13 14 Loading/Unloading a Cassette Use only video cassettes marked with the Dlogo. 1. Slide the OPEN/EJECT switch and open the cassette compartment cover. The cassette compartment opens automatically. 2. Load/unload the cassette. • Load the cassette with the window facing the grip belt. • Unload the cassette by pulling it straight out. 3. Press the Pmark on the cassette compartment until it clicks. 4. Wait for the cassette compartment to retract automatically and close the cassette compartment cover. . Do not interfere with the cassette compartment while it is opening or closing automatically, or attempt to close the cover before the cassette compartment has fully retracted. . Be careful not to get your fingers caught in the cassette compartment cover. If the camcorder is connected to a power source, cassettes can be loaded/ unloaded even if the POWER switch is set to OFF. r e w q Tape protection tab 15 Basic Functions - Preparations E Installing the Backup Battery The backup battery allows the camcorder to retain date, time ( 19) and other camcorder settings while the power source is disconnected. Connect a power source to the camcorder when replacing the backup battery to retain the settings. 1. Open the terminal cover. 2. Open the backup battery cover. 3. Insert the lithium battery with the + side facing outward. 4. Close the backup battery cover. 5. Close the terminal cover. WARNING! • The battery used in this device may present a fire or chemical burn hazard if mistreated. Do not recharge, disassemble, heat above 100 °C or incinerate the battery. • Replace the battery with a CR2025 made by Panasonic, Hitachi Maxell, Sony, Sanyo, or with Duracell2025. Use of other batteries may present a risk of fire or explosion. • The used battery should be returned to the supplier for safe disposal. . Do not pick up the battery using tweezers or other metal tools as this will cause a short circuit. .Wipe the battery with a clean dry cloth to ensure proper contact. . Keep the battery out of reach of children. If it is swallowed, seek medical assistance immediately. The battery case may break and the battery fluids may damage stomach and intestines. . Do not disassemble, heat or immerse the battery in water to avoid the risk of explosion. The backup battery has a life span of about a year. “j” flashes in red to inform you that it needs to be replaced. w e r q t 16 Preparing the Camcorder Adjusting the Viewfinder (Dioptric Adjustment) 1. Turn on the camcorder and keep the LCD panel closed. 2. Pull out the viewfinder. 3. Adjust the dioptric adjustment lever. Attaching the Lens Cap 1. Attach the cord to the lens cap. 2. Pass the grip belt through the loop on the cord. Press the buttons on the lens cap when attaching/removing it. Hook the lens cap on the grip belt while you are recording, and place it over the lens when you have finished. Fastening the Grip Belt Hold the camcorder with your right hand and adjust the belt with your left. Adjust the grip belt so that you can reach the zoom lever with your index finger, and the start/stop button with your thumb. Attaching the Shoulder Strap Pass the ends through the strap mount and adjust the length of the strap. E SS-900 Shoulder strap Basic Preparations 17 Using the Wireless Controller Point it at the camcorder’s remote sensor when you press the buttons. Inserting Batteries The wi...
Otros modelos de este manual:Videocámaras - MVX20i (4.93 mb)