


Votos - 2, Puntuación media: 4.5
(

 )
)
|
Fotos y especificaciones Canon Digital IXUS 70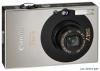 |


Otros manuales para este modelo:
Resumen del manual
However, the center frame will not display when using the digital zoom. • You are recommended to set the shooting mode to and the exposure compensation setting to [±0] before setting a custom white balance. The correct white balance may not be obtained when the exposure setting is incorrect (image appears completely black or white). • Shoot with the same settings as when reading the white balance data. If the settings differ, the optimal white balance may not be set. In particular, the following should not be changed. -ISO Speed -Flash Setting the flash to on or off is recommended. If the flash fires when reading the white balance data with the flash set to (Auto), make sure that you also use the flash when you shoot. • Since the white balance data cannot be read in Stitch Assist mode, preset the white balance in another shooting mode beforehand. • If you register the (Custom White Balance) function with the button (p. 67), obtain the white balance data each time you press the button. Shooting 57 Shooting in a My Colors Mode Shooting in a My Colors Mode You can change the look and feel of the pictures you take. My Colors Settings My Colors Off Records normally with this setting. Vivid Emphasizes the contrast and color saturation to record bold colors. Neutral Tones down the contrast and color saturation to record neutral hues. Sepia Records in sepia tones. B/W Records in black and white. Positive Film Use this option to make red, green or blue colors more intense like the Vivid Red, Vivid Green or Vivid Blue effects. It can produce intense natural- appearing colors like those obtained with positive film. Lighter Skin Tone* Use this option to make skin tones lighter. Darker Skin Tone* Use this option to make skin tones darker. Vivid Blue Use this option to emphasize blue tints. It makes blue subjects, such as the sky or ocean, more vivid. Vivid Green Use this option to emphasize green tints. It makes green subjects, such as mountains, new growth, flowers and lawns, more vivid. Vivid Red Use this option to emphasize red tints. It makes red subjects, such as flowers or cars, more vivid. Custom Color Use this option to adjust the contrast, sharpness or saturation settings or the color balance between red, green, blue and skin tones*. It can be used to make subtle adjustments, such as making blue colors more vivid or face colors brighter. * If the image contains colors that are the same as human skin, those colors will also be changed. You may not obtain the expected results depending on the skin color. 1 FUNC. Menu * (My Colors Off). See Menus and Settings (p. 22). *Default setting. ..Use the or button to select a My Colors mode. ..In See Setting the Camera to a Custom Color Mode (p. 59). ..When not in Press the FUNC./SET button to return to the shooting screen. 2 Shoot. Setting the Camera to a Custom Color Mode This mode allows you to adjust the contrast, sharpness and saturation and the color balance for red, green, blue and skin tones. 1 FUNC. Menu * (My Colors Off) (Custom Color) . See Menus and Settings (p. 22). *Default setting. 2 Use the or button to select [Contrast], [Sharpness], [Saturation], [Red], [Green], [Blue] or [Skin Tone] and the or button to adjust the setting. category ..The altered color will display. 3 . ..This completes the setting. If you press the MENU button at this point, you will return to the screen where you can select a My Colors mode. Select a Adjust it Shooting 59 Changing Colors Changing Colors You can shoot images with the original colors transformed. This can be performed on movies as well as still images, allowing you to enjoy photographing with image or movie effects. However, depending on the shooting conditions, the images may appear rough or you may not get the expected color. Before you try to photograph important subjects, we highly recommend that you shoot trial images and check the results. If you set [Save Original] (p. 64) to [On] when shooting a still image, you can record the original image as well the transformed one. Color Accent Use this option to have only the color specified in the LCD monitor remain and to transform all others to black and white. Color Swap Use this option to transform a color specified in the LCD monitor into another. The specified color can only be swapped into one other color, and multiple colors cannot be chosen. The ISO speed will rise depending on the shooting conditions, which may increase the "noise" in the image. Shooting in the Color Accent Mode 1 Stills: FUNC. Menu *(Auto) (Color Accent). Movies: FUNC. Menu * (Standard) (Color Accent). See Menus and Settings (p. 22). *Default setting. Stills Movies 2 . ..The Color Accent mode will take effect. 3 . ..The camera will switch to color input mode and the display will alternate between the original image and the color accent image (using the previously set color). 4 Aim the camera so that the color you wish to retain appears at the center of the LCD monitor and press the button. ..Only...
Otros modelos de este manual:Videocámaras - Digital IXUS 75 (6.72 mb)