


Votos - 2, Puntuación media: 4
(

 )
)
|
Fotos y especificaciones Sony DCR-SR200E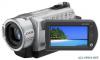 |


Otros manuales para este modelo:
Videocámaras - DCR-SR200E (722.89 kb)
Videocámaras - DCR-SR200E (5.67 mb)
Videocámaras - DCR-SR200E (5.76 mb)
Videocámaras - DCR-SR200E (5.57 mb)
Resumen del manual
10 hours and 50 minutes DCR-SR72E/SR82E: approx. 21 hours and 40 minutes DCR-SR33E/SR190E/SR200E/SR290E/ SR300E: approx. 14 hours and 30 minutes To record still images on a “Memory Stick Duo” You can change the recording media of still images to a “Memory Stick Duo.” You can use only a “Memory Stick Duo” marked with or Memory Stick PRO Duo- ■ Inserting/ejecting a “Memory Stick Duo” Open the LCD panel, then insert the “Memory Stick Duo” into the Memory Stick Duo slot in the right direction until it clicks. (“Memory Stick Duo”) To eject a “Memory Stick Duo,” open the LCD panel, lightly push the “Memory Stick Duo” in once. • When the ACCESS lamp is lit or flashing, your camcorder is reading/writing data. Do not shake or knock your camcorder, turn the power off, eject the “Memory Stick Duo,” or remove the battery pack. Otherwise, image data may be damaged. • If you insert the “Memory Stick Duo” into the slot in the wrong direction, the “Memory Stick Duo,” the “Memory Stick Duo” slot, or image data may be damaged. • The numbers of recordable still images on the “Memory Stick Duo” (1GB) are followings (with the default setting of the image size as shown in ( )); DCR-SR32E/SR33E/SR42E: 5,900 ([VGA (0.3M)]) DCR-SR52E/SR62E/SR72E/SR82E: 1,800 ([1.0M]) DCR-SR190E/SR200E: 480 ([4.0M]) DCR-SR290E/SR300E: 315 ([6.1M]) • All numbers measured when using a “Memory Stick Duo” made by Sony Corporation. The number of recordable images varies depending on the recording environment. • The number of recordable images varies depending on the image quality or the image size. For details, see “Handycam Handbook” (PDF). ■ To change the recording media of still images © Touch <8= (OPTION) t ¡g; tab t [STILL MEDIA]. @ Select the media in which you want to save still images, then touch I OK I. Your camcorder returns to recording standby mode. On Easy Handycam operation By pressing the EASY button, nearly all settings on the camcorder will be automatically operated so that you can perform recording or playing back operation without detailed settings. During Easy Handycam operation, IMSM appears on the LCD screen. To cancel Easy Handycam operation, press EASY again. • You cannot use some buttons/functions during Easy Handycam operation. 12 Playback [►] (VIEW IMAGES) button B - ^ POWER switch 2 E (VIEW IMAGES) button A © Returns to the recording screen @ Previous 6 images 3 Next 6 images 4 Returns to the recording screen 5 Displays movies © Displays still images on the hard disk 7 Displays still images on a “Memory Stick Duo” 8 Searches for images by date 9 (OPTION) 1 Turn the POWER switch to turn on your camcorder. 2 Press [►] (VIEW IMAGES) A (or B) button. The VISUAL INDEX screen appears on the LCD screen. (It may take some time to display the thumbnails.) 3 Start playback. Movies M Still Images Û Touch the tab, and the movie to be played back. Beginning of the Toggles Play scene/previous or Pause as you Next scene touch scene tu 101-0001 LsJ L±3J [^«l lüSfcJ I 1 Stop (go to the VISUAL Reverse/Forward INDEX screen) Touch the û, or cP tab, and the still image to be played back. Slide show button □jgj Ljj^j pgiïi [wp] Eg i Go to the VISUAL INDEX screen Previous/ Next 13 Recording/Playback To adjust the sound volume of movies When playing back a movie, touch (OPTION) t tab t [VOLUME], then adjust the volume with | — |/^+~|. • When playback from the selected movie reaches the last movie, the screen returns to the VISUAL INDEX screen. • Touch during pause to play back movie slowly. • One touch of [^H]/®^] makes the reverse/fast forward approximately 5 times faster, 2 touches makes it approximately 10 times faster, 3 touches makes it approximately 30 times faster, and 4 touches makes it approximately 60 times faster. • !►! appears with the image on each of the tab that was lastly played back/recorded (B for the still image) last time. When you touch a movie marked with ► , you can play it back from the point you have stopped previously. 14 Parts and functions used for the camcorder DCR-SR32E/SR33E/SR42E/ SR52 E/SR62 E/SR72 E/SR82E a> DCR-SR190E/SR200E/ SR290E/SR300E a> DCR-SR32E/SR33E/SR42E/SR52E/ SR62E/SR72E/SR82E DCR-SR190E/SR200E/ SR290E/SR300E —m —№ HÜ f—H EÜh ft Handycam Station Recording 1 Power zoom lever To use zoom, move the power zoom lever. Move the power zoom lever slightly for a slower zoom. Move it further for a faster 2 NIGHTSHOT PLUS switch*1 To record in dark places, set the NIGHTSHOT PLUS switch to ON. ( © appears.) 6 Built-in microphone Records sound. Sound picked up by the built-in microphone is converted to 5.1ch surround sound and recorded.*2 zoom. 15 Recording/Playback 7 Remote sensor*3 Receive the signal from the Remote Commander. 8 Flash*2 Flashes when using the flash. 9 LCD screen To record in mirror mode, open the LCD screen 90 degrees to the camcorder (©), then rotate it 180 degrees to the lens side (©). Щ Zoom buttons ...
Otros modelos de este manual:Videocámaras - DCR-SR190E (2.06 mb)
Videocámaras - DCR-SR52E (2.06 mb)
Videocámaras - DCR-SR290E (2.06 mb)
Videocámaras - DCR-SR300E (2.06 mb)