


Votos - 3, Puntuación media: 4.3
(

 )
)
|
Fotos y especificaciones Sony DCR-HC52E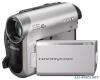 |


Resumen del manual
11) will not be correctly displayed under the following conditions. – The battery pack is not attached correctly. – The battery pack is damaged. – The battery pack is worn-out (for Battery Info only). • The power will not be supplied from the battery as long as the AC Adaptor is connected to the DC IN jack of your camcorder, even when the power cord (mains lead) is disconnected from the wall outlet (wall socket). On the charging/recording/playback time • Times measured with the camcorder at 25 °C (77 °F). (10 °C to 30 °C (50 °F to 86 °F) is recommended.) • The recording and playback time will be shorter when you use your camcorder in low temperatures. • The recording and playback time will be shorter depending on the conditions under which you use your camcorder. On the AC Adaptor • Use the nearby wall outlet (wall socket) when using the AC Adaptor. Disconnect the AC Adaptor from the wall outlet (wall socket) immediately if any malfunction occurs while using your camcorder. • Do not use the AC Adaptor placed in a narrow space, such as between a wall and furniture. • Do not short-circuit the DC plug of the AC Adaptor or battery terminal with any metallic objects. This may cause a malfunction. • Even if your camcorder is turned off, AC power (house current) is still supplied to it while connected to the wall outlet (wall socket) via the AC Adaptor. Step 3: Turning the power on and setting the date and time Set the date and time when using this camcorder for the first time. If you do not set the date and time, the [CLOCK SET] screen appears every time you turn on your camcorder or change the POWER switch position. Touch the button on the LCD screen. POWER switch 1 While pressing the green button, slide the POWER switch in the direction of the arrow to turn on the respective lamp. CAMERA: To record on a tape. PLAY/EDIT: To play or edit pictures. The [CLOCK SET] screen appears. CLOCK SET Y M D OK 2008 11--: 000 2 Set [Y] (year) with / . You can set any year up to the year 2079. 3 Move to [M] (month) with , then set with / . 4 Move to [D] (day) with , then set with / and repeat for the hour and minute. 5 Make sure the date and time settings are correct, then touch . The clock starts. To turn off the power Slide the POWER switch to OFF(CHG). To reset the date and time You can set the desired date and time by touching t [PAGE2] t [CLOCK SET] (p. 28). b Notes • If you do not use your camcorder for about 3 months, the built-in rechargeable battery gets discharged and the date and time settings may be cleared from the memory. In that case, charge the rechargeable battery and then set the date and time again (p. 65). • At the time of purchase, the power is set to turn off automatically if you leave your camcorder without any operation attempted for approximately 5 minutes, to save battery power ([A.SHUT OFF], p. 42). z Tips • The date and time are not displayed while recording, but they are automatically recorded on the tape, and can be displayed during playback (see page 33 for [DATA CODE] (During Easy Handycam operation, you can set only [DATE/TIME])). • If the buttons on the touch panel do not work correctly, adjust the touch panel (CALIBRATION) (p. 63). Continued , 13 Getting Started Step 3: Turning the power on and setting the date and time (Continued) Changing the language setting You can change the on-screen displays to show messages in a specified language. Touch t [MENU] t (SETUP MENU) t [ LANGUAGE], then select the desired language. 15 Getting Started Step 4: Making setting adjustments before recording Slide the LENS COVER switch to OPEN. After recording, set the LENS COVER switch to CLOSE, to close the lens cover. Open the LCD panel 90 degrees to the camcorder (1), then rotate it to the best angle to record or play (2). b Notes • Do not press the buttons on the LCD frame accidentally when you open or adjust the LCD panel. z Tips • If you rotate the LCD panel 180 degrees to the lens side, you can close the LCD panel with the LCD screen facing out. This is convenient during playback operations. • See [LCD BRT] (p. 33) to adjust the brightness of the LCD screen. • Press DISP/BATT INFO to toggle the screen indicators (such as Battery Info) on or off. You can view pictures using the viewfinder to avoid wearing down the battery, or when the picture seen on the LCD screen is poor. z Tips • You can adjust the brightness of the viewfinder backlight by selecting (LCD/VF SET) - [VF B.L.] (p. 40). Fasten the grip belt and hold your camcorder correctly. Opening the lens cover The LCD panel 2 2 1 180 degrees (max.) 90 degrees (max.) 90 degrees to the camcorder DISP/BATT INFO The viewfinder The grip belt Viewfinder lens adjustment lever Move it until the picture is clear. Viewfinder 2 1 4 3 Step 5: Inserting a Cassette You can use mini DV cassettes only (p. 59). 1 Slide and hold the OPEN/ EJECT lever in the direction of the arrow and open the lid. OPEN/EJECT lever Lid The cassette compartment automatically comes out and op...
Otros modelos de este manual:Videocámaras - DCR-HC51E (1.47 mb)
Videocámaras - DCR-HC53E (1.47 mb)
Videocámaras - DCR-HC54E (1.47 mb)