


Votos - 4, Puntuación media: 3.3
(


 )
)
|
Fotos y especificaciones Sony HDR-XR150E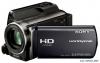 |


Otros manuales para este modelo:
Resumen del manual
You cannot perform [EMPTY] unless you connect the AC Adaptor to the wall outlet (wall socket). . To avoid the loss of important images, they should be saved on a computer or other devices before performing [EMPTY]. . Disconnect all cables except the AC Adaptor. Do not disconnect the AC Adaptor during the operation. . While deleting data, do not apply any vibrations GB 5 Customizing camcorder (Other setup items) to the camcorder body, the setting becomes See “Using menus” (p. 58) on the operation. [NORMAL] automatically. The default settings are marked with .. .BEEP This adjustment does not affect the recorded images in any way. . . Tips SOUND/DISP SET .VOLUME . LCD COLOR You can adjust the color of the LCD screen by touching / . You can adjust the volume of playback sound by touching / . .ON A melody sounds when you start/stop recording, or operate the touch panel. OFF Cancels the melody. . LCD BRIGHT You can adjust the brightness of the LCD screen by touching / . Tips This adjustment does not affect the recorded . . images in any way. . DISPLAY SET You can set the duration of displaying the icons or indicators on the LCD screen. .AUTO1 Displays for about 3 seconds. The rec & zoom buttons on the LCD is displayed. AUTO2 Displays for about 3 seconds. The rec & zoom Tips buttons on the LCD is not displayed. This adjustment does not affect the recorded . . images in any way. ON Always displays. The rec & zoom buttons on . LCD BL LEVEL (LCD backlight level) the LCD is not displayed. You can select the brightness of the LCD screen’s backlight. .NORMAL Standard brightness. Tips . . The icons or indicators are displayed in the following cases. When you turn on your camcorder. The LCD screen is touched (Except rec & . . . BRIGHT Brightens the LCD screen. zoom buttons on LCD). When you switch your camcorder to the movie recording, photo recording, or . . When you connect your camcorder to the wall outlet (wall socket) using the supplied AC Adaptor, [BRIGHT] is automatically selected for the setting. When you select [BRIGHT], battery life is slightly reduced during recording. If you open the LCD panel 180 degrees to face the screen outside and close the LCD panel Notes playback modes. . . GB OUTPUT SETTINGS OUTPUT SETTINGS You need to convert the signal depending on the TV connected when playing back movies and photos. The recorded movies and photos are played back as following illustrations. .16:9 Select this to view your movies on a 16:9 (wide) TV. The recorded movies and photos are played back as shown below. Movies and photos Movies and photos recorded in 16:9 recorded in 4:3 mode (wide) mode 4:3 Select this to view your movies and photos on a 4:3 standard TV. The recorded movies and photos are played back as shown below. Movies and photos Movies and photos recorded in 16:9 recorded in 4:3 mode (wide) mode . Notes . Horizontal to vertical ratio of high definition image quality (HD) movies is 16:9. . COMPONENT Select [COMPONENT] when connecting your camcorder to a TV with the component input jack. 576i Select this when connecting your camcorder to a TV with the component input jack. . 1080i/576i Select this when connecting your camcorder to a TV that has the component input jack and is capable of displaying the 1080i signal. . HDMI RESOLUTION Select the output image resolution when connecting your camcorder to a TV with an HDMI cable (sold separately). HD CONTENTS Set the output image resolution recorded with high definition image quality (HD). .AUTO Normal setting (outputs the signal according to the TV automatically). 1080p Outputs the 1080p signal. 1080i Outputs the 1080i signal. 720p Outputs the 720p signal. 576p Outputs the 576p signal. Customizing camcorder GB STD CONTENTS STD CONTENTS .AUTO Normal setting (outputs the signal according to the TV automatically). 576p Outputs the 576p signal. 576i Outputs the 576i signal. . DISP OUTPUT (Display output) You can set where the screen displays are to be output. . LCD PANEL Shows displays such as the time code on the LCD screen. V-OUT/PANEL Shows displays such as the time code on the LCD screen, and on the TV screen. CLOCK/ LANG . CLOCK SET See page 15. . AREA SET You can adjust a time difference without stopping the clock. Set your local area when using your camcorder in other time zones. Refer to the world time difference on page 94. . SUMMERTIME You can change this setting without stopping the clock. Set to [ON] to move the time forward 1 hour. . OFF Does not set the summertime. ON Sets the summertime. . LANGUAGE SET You can select the language to be used on the LCD screen. . Tips . Your camcorder offers [ENG[SIMP]] (simplified English) for when you cannot find your native tongue among the options. POWER SETTINGS . A.SHUT OFF (Auto shut off ) You can set your camcorder to turn off automatically when you do not operate your camcorder for more than about 5 minutes. . 5min The camcorder turns off automatically. NEVER The camcorder does not turn off automatically. . ...
Otros modelos de este manual:Videocámaras - HDR-CX110E (2.21 mb)
Videocámaras - HDR-CX115E (2.21 mb)
Videocámaras - HDR-CX116E (2.21 mb)
Videocámaras - HDR-CX150E (2.21 mb)