


Votos - 0, Puntuación media: 0
(
 )
)
|
Fotos y especificaciones Olympus PT-EP08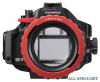 |


Otros manuales para este modelo:
Resumen del manual
Perform the test after the above causes have been eliminated. CAUTION: If the advance test should show water leakage with normal handling, stop using the Case and contact your dealer or an Olympus service station. EN EN 10 3. Installing the digital camera 3. Installing the digital camera Check the digital camera Check the digital camera before loading it in the Case. 1. Battery Confirmation It is impossible to change the batteries when using the Case. Make sure that you have sufficient remaining battery capacity before use. 2. Check the remaining number of pictures Check that the image storage medium has enough room for the number of pictures you want to take. 3. Remove the strap, lens cap and filter from the camera. If the digital camera is loaded without removing the strap and lens cap, the Case cannot be sealed properly and may leak. 4. Attach the zoom gear (optional) and the antireflective ring (optional). Example of 14-42mm IIR lens Antireflective ring For details, refer to the instruction manual of the zoom gear and the antireflective ring. EN Zoom gear Antireflective ring M.ZUIKO DIGITAL ED 14-42mm PPZR-EP01 POSR-EP01 M.ZUIKO DIGITAL ED 14-42mm II/IIR PPZR-EP02 POSR-EP03 M.ZUIKO DIGITAL ED 9-18mm PPZR-EP02 POSR-EP02 M.ZUIKO DIGITAL 45mm – POSR-EP03/POSR-EP05 * If the version of the camera body is 1.2 or later, M.ZUIKO DIGITAL ED 12-50mm can be used without using the zoom gear and anti-reflection ring. When using this lens, set the zoom ring position to “EZOOM”. When the underwater mode is selected (P.17), the zoom position is fixed. Underwater Wide-Angle: Maximum wide angle state / Underwater Macro: Maximum telephoto state 5. Turn off the EVF. EN 11 Open the Case 1 Slide and hold the slide lock towards the arrow direction (1) and turn the open/close dial clockwise (2). 2 Open the rear lid of the Case gently. 12Slide lock CAUTION: Do not exert too much force while turning the open/close dial. Doing so may damage the dial. Install the flash to the camera Install the flash supplied with the camera. Do not pop up the light emitting part. EN EN 12 Load the digital camera 1 Confirm that the digital camera is OFF. 2 Gently insert the digital camera into the Case. 3 Insert a silica gel bag (1g) between the bottom of the digital camera and the Case. The silica gel bag provided for prevention of fogging. 2 3 CAUTION: • The silica gel bag will be caught when the Case is sealed and water leakage will occur. • Once silica gel has been used, the moisture absorption performance will be impaired. Always replace the silica gel when the Case is opened and closed. Make sure the camera is loaded properly EN Check the following points before sealing the Case. • Is the digital camera loaded properly? • Is silica gel inserted all the way at the specified location? • Is the O-ring attached properly to the opening on the Case? • Is there any dirt or foreign matter on the O-ring or the O-ring contact surface on the front lid? • Is the waterproof function maintenance performed? (For details of the maintenance, see “Maintaining the Waterproof Function” (P.20) of this manual.) EN 13 Seal the Case 1 Close the Case gently while aligning the mounting projection of the rear lid and groove. 2 Turn the open/close dial counter clockwise. • The Case is sealed. Close CAUTION: • If the open/close dial is not fully turned, the Case will not be sealed. This will cause water leakage. • Close the rear lid of the Case so that the lens cap or monitor hood strap doesn’t catch. If it catches, water leaks may result. Check the operation of the loaded camera After sealing the Case, check that the camera operations normally. • Push the ON/OFF button on the Case and confirm that the camera turns ON/OFF. • Turn the mode dial on the Case and confirm that the camera mode switches properly. • Press the shutter lever on the Case and confirm that the camera shutter releases. • Operate the zoom dial on the Case and confirm that the camera’s lens is controlled. • Operate other control buttons on the Case and confirm that the camera functions properly as intended. EN EN 14 Water Leakage Test The final test after loading the camera is explained below. Always perform this test. It can be performed easily in a water tank or a bathtub. Confirm the operation of the different buttons. The required time is about five minutes. • At first, immerse the Case for only three seconds and check that no water enters the Case. • Next, immerse the Case for 30 seconds and check that no water enters the Case. • Then, immerse the Case for 3 minutes, operate all buttons and levers, and check the following: -check that no water drops have the entered the Case. -check that the Case is not fogged internally. -check that no water has entered the Case. • If the inside of the Case becomes fogged or there are water drops in the Case, repeat the maintenance of the O-ring and perform the water leakage test again. EN EN 15 4. How to connect the underwater flash 4. How to connect the underwa...
Otros modelos de este manual:Cámaras - PT‑EP08 (1.58 mb)