


Votos - 3, Puntuación media: 4.7
(
 )
)
)
|
Fotos y especificaciones Roland C-330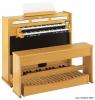 |


Otros manuales para este modelo:
Resumen del manual
No part of this publication may be reproduced in any form without the written permission of ROLAND CORPORATION. Roland is a registered trademark of Roland Corporation in the United States and/or other countries. Shortcuts By using these shortcuts you can directly access a desired screen without going through a menu screen. Г ЛТП ГТГ UTi —1 © о©©©© ©© — (©) O00O© ©0 ©©©о© ©0 !%i_ Selected stop name I « Voice Palette » J MAN-I : 8 Principal | VP3 = Currently selected variation PeHalhoarH Ston - Lower Manual Stop^B Inner Manual StonB A II III 1 1 1 1 III 1 I 1 © ©©©©© ©© 1 | Irrm- * | [ © ©©©©© ©0 O00O© ©0 © ©© ©©© © If the Voice Palette screen does not appear, press the [Value/Exit Menu] knob several times to access the main screen (which shows the memory bank), and then proceed as above. Main Screen M01 ® ' Transpose : 0 Temperament: EQUAL A=440.0: MODERN 3. Select a variation. Choose from four variations, VPO through VP3. Storing Your Favorite Settings All settings for the upper manual, lower manual, and pedalboard can be stored together in one of the general pistons ©-© Storing Recalling Turning the settings off + ©©©©© ©©©©© The state of the general memory [1]-[5] pistons can be stored as a "memory bank." The piston sets the organ to the condition in which all tablets and couplers are cancelled so that no sounds are selected. This piston is also called the "cancel piston." On the C-380, you can store only the each manual settings to a "division memory piston." Making Settings in the Menus Heres how to make settings using the menus. 1. Access the menu. 2. Select the item. 3. Enter the item. Satellite Volume Satellite Volume 4. Change the setting. Exit Menu (Push) m \ Value \ 5. Put the setting into effect. Press If a Yes/No confirmation ^ screen appears_^ • Cancel the setting. • Return to the previous menu. Press Menu List ' For details, refer to the Owner's Manual. Setting category Contents of the category Detailed items Group 1 Demo • Listen to demo songs Song Tempo Satellite VR Pitch 2 Pitch/Tuning • Settings for pitch and Temperament Temperament Tuning Transpose 3 Song Recorder • Recording settings • Play back settings • Saving, deleting, and copying song data Song Tempo Measure Play Mode Devision Mute Metronome Volume Beat Save Song Delete Song Copy Song 4 Room Modeling • Reverb settings Room Type Wall Type 5 USER/MIDI Coupler • USER coupler settings • MIDI coupler settings * Details of the available items will depend on the Source/MIDI CH setting. For details, refer to the Owner's Manual. 6 Console • Display contrast • V-LINK setting • MEL and BASS coupler settings Display Contrast V-LINK Bass Split Mel Split 7 Tremulant • Tremulant settings Depth Rate MAN-I/Pedal MAN-II 8 Exp. Pedal • Expression pedal settings Shutter Kick SW R Kick SW L Exp.Mode 9 Audio • External device settings Aux In Volume Aux In Reverb Line Out Gain 10 MIDI • MIDI settings Local Tone Name Tx Piston 11 Save/Load (USB) • Save/load the contents • Format the USB Memory • Factory Reset Save Memory Bank Load Memory Bank Copy Memo...