


Votos - 3, Puntuación media: 3.7
(

 )
)
|
Fotos y especificaciones Sony NEX-VG20E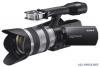 |


Otros manuales para este modelo:


Resumen del manual
. . . . . . . . . . . . . . . . . . . . . . . . . . . . . . . . . . . . . . . . . . . . . . . . . . . . . . . . . . . . . . . . . . . . . . . . . . . . . . . . . . . . . . . . . . . . . . . . . 53 Creating a standard definition image quality (STD) disc with a recorder, etc... . . . . . . 54 GB Customizing your camcorder Customizing your camcorder . . . . . . . . . . . . . . . . . . . . . . . . . . . . . . . . . . . . . . . . . . . . . . . . . . . . . . . . . . . . . . . . . . . . . . . . . . . . . . . . . . . . . . 56 Getting detailed information from the “Handycam” Handbook.. . . . . . . . . . . . . . . . . . . . . . . . 60 Additional information Troubleshooting. ............................................................................... 61 Recording time of movies/number of recordable photos.. . . . . . . . . . . . . . . . . . . . . . . . . . . . . . . 63 Precautions. ......................................................................................... 65 Specifications.. . . . . . . . . . . . . . . . . . . . . . . . . . . . . . . . . . . . . . . . . . . . . . . . . . . . . . . . . . . . . . . . . . . . . . . . . . . . . . . . . . . . . 67 Quick reference Screen indicators. .................................................................................. 70 Parts and controls. ................................................................................. 72 Index. ................................................................................................. 75 Table of GB Getting Started Getting Started Step 1: Checking supplied items Make sure that you have following items supplied with your camcorder. The numbers in ( ) are the supplied quantity. All models . This camcorder (1) . Body cap (attached to camcorder NEXVG20E; supplied but not attached to other models) (1) (p. 16) . AC Adaptor (1) (p. 13) . Power cord (mains lead) (1) (p. 13) . Component A/V Cable (1) (p. 38) . A/V connecting cable (1) (p. 38) . USB cable (1) (p. 50) . Wireless Remote Commander (RMT835) (1) A button-type lithium battery is already installed. . Rechargeable battery pack (NP-FV70) (1) (p. 13) . Battery Cover (1) (p. 12) . Wind Screen (1) (p. 12) . Large eyecup (1) (p. 26) GB 10 . . . 43) .“PMB” (Software, including “PMB Help”) .Image Data Converter (RAW development software) .“Handycam” Handbook (PDF) . Operating Guide (This manual) (1) NEX VG20EH . Zoom lens (E 18-200mm F3.5-6.3 OSS) (attached to the camcorder) (1) (p. 16) . Lens hood (1) (p. 20) . Front lens cap (attached to the lens) (1) (p. 16) . Rear lens cap (1) (p. 16) Getting GB Step 2: Attaching the supplied accessories Attaching the lens See page 16 for information on attaching the lens. The NEX-VG20E does not come with the E 18-200mm F3.5-6.3 OSS lens. Please use appropriate lenses (sold separately). For NEX-VG20EH models, the lens is attached to the camcorder at the time of purchase. Attaching the Wind Screen Use the Wind Screen when you want to reduce the wind noise recorded by the microphone. Attach the Wind Screen with the Sony logo facing down. Attaching the battery cover Attach the battery cover after attaching the battery pack. Attach the battery cover with the projecting part (.) facing as shown in the illustration. . GB 1 Getting Step 3: Charging the battery pack Battery pack CHG (charge) lamp DC IN jack To the wall outlet (wall socket) AC Adaptor DC plug Power cord (Mains lead) Getting Step 3: Charging the battery pack Battery pack CHG (charge) lamp DC IN jack To the wall outlet (wall socket) AC Adaptor DC plug Power cord (Mains lead) You can charge the “InfoLITHIUM” battery pack (V series) after attaching it to your camcorder. Notes You cannot attach any “InfoLITHIUM” battery pack other than the V series to your camcorder. You cannot attach the “InfoLITHIUM” battery pack NP-FV30/FV50, even though they are V series. . . . 1 Slide the POWER switch to OFF (the default setting). 2 Attach the battery pack by sliding it in the direction of the arrow until it clicks. 3 Connect the AC Adaptor and the power cord (mains lead) to your camcorder and the wall outlet (wall socket). The CHG (charge) lamp lights up and charging starts. The CHG (charge) lamp turns off when the battery pack is fully charged. GB 1 4 4 jack of your camcorder. Charging time Approximate time (min.) required when you fully charge a fully discharged battery pack. Battery pack Charging time NP-FV70 (supplied) 195 NP-FV100 390 . The charging times shown in the table above are measured when charging the camcorder at a temperature of 25 .C (77 °F). It is recommended that you charge the battery in a temperature range of 10 .C to 30 .C (50 °F to 86 °F). . Tips . See page 63 on recording and playing time. . When your camcorder is on, you can check the approximate amount of remaining battery power with the remaining battery indicator at the upper right on the LCD screen. To remove the battery pack Slide the POWER switch to OFF. Slide the BATT (battery) release lever (.) and remove the batt...
Otros modelos de este manual:Videocámaras - NEX-VG20EH (5.12 mb)