


Votos - 2, Puntuación media: 4
(

 )
)
|
Fotos y especificaciones Canon FS21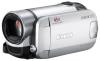 |


Resumen del manual
You can mark in advance the photos you want to print and set the desired number of copies as a print order ( 72). Canon printers: SELPHY printers of the CP, DS and ES series and PIXMA printers marked with the PictBridge logo. ( 25) Connecting the Camcorder to the Printer 1 Turn on the printer. 2 Connect the camcorder to the printer using the supplied USB cable. • Connection . Refer to Connection Diagrams ( 75). • If the device type selection screen appears, select [PC/PRINTER] and press . • / / Select in advance the memory from which you want to print the photos ( 40). Photos • If the photo index screen is displayed, move the zoom lever toward T to display a photo. • appears and changes to . • The (print/share) button lights up and the current print settings will be displayed for approx. 6 seconds. IMPORTANT • If continues to flash (for more than 1 minute) or if does not appear, the camcorder is not correctly connected to the printer. In such case, disconnect the USB cable and turn off the camcorder and the printer. After a short while, turn them on again, set the camcorder to mode and restore the connection. • During the following operations, even if you connect a printer to the camcorder it will not be recognized. -Erasing all photos -Erasing all transfer orders -Erasing all print orders NOTES • will appear for photos that cannot be printed. • We recommend powering the camcorder using the compact power adapter. • Refer also to the printer’s instruction manual. • If you have no intention to use the optional DW-100 DVD Burner, you can set [USB SETTING] to [ PC/PRINTER] ( 90) so the device type selection screen does not appear every time you connect the camcorder to a printer. • Connection to a PictBridge-compatible printer will not work when the memory card contains 1,800 photos or more. • For best performance, we recommend keeping the number of photos on the memory card under 100. • Disconnect the USB cable before changing the operating mode. Printing with the (Print/Share) Button You can print a photo without changing the settings simply by pressing . 1 Select ( ) the photo you wish to print. 2 Press . • Printing starts. The button flashes and stays on when the printing is completed. • To continue printing, select ( ) another photo. Selecting the Print Settings You can select the number of copies and other settings for printing. The setting options vary depending on your printer model. ( 25) Options [PAPER] [ PAPER SIZE]: Available paper sizes vary depending on the printer model. [ PAPER TYPE]: Select [PHOTO], [FAST PHOTO], [PLAIN] or [DEFAULT]. [ PAGE LAYOUT]: Select [DEFAULT], [BORDERED] or one of the following page layouts. [BORDERLESS]: The photo is enlarged and may be slightly cropped at the edges to fit the paper. [2-UP], [4-UP], [8-UP], [9-UP], [16-UP]: Refer to the sidebar on page 72. [ ] (Date print) Select [ON], [OFF] or [DEFAULT]. [ ] (Print effect) Available only with printers compatible with the Image Optimize function. Select [ON], [OFF] or [DEFAULT]. Canon PIXMA/SELPHY DS printers: You can also select [VIVID], [NR] and [VIVID+NR]. [ ] (Number of copies) Select 1-99 copies. NOTES Print setting options and [DEFAULT] settings vary depending on the printer model. For details, refer to the printer’s instruction manual. Printing after Changing the Print Settings 2 Select ( ) and press . The print settings menu appears. Paper settings Current paper settings (paper size, paper type and page layout) Number of copies Print effect Date printing 3 In the print settings menu, select ( , ) the setting you want to change and press . 4 Select ( ) the desired setting option and press . 5 Select ( , ) [PRINT] and press . • Printing starts. The print settings menu disappears when the printing is completed. • To continue printing, select ( ) another photo. TO CANCEL THE PRINTING 1 Press while printing. 2 Select ( ) [OK] and press . WHEN YOU HAVE FINISHED PRINTING Disconnect the cable from the camcorder and printer and turn off the camcorder. 1 Push the joystick ( ) to display the joystick guide. Photos PRINT ERRORS If an error occurs while printing, an error message, for example [NO PAPER], will appear on the camcorder. Solve the problem referring to the error message list ( 103) and to the printer’s instruction manual. • Canon’s PictBridge-compatible printers: If printing does not resume automatically after you solved the problem, select [CONTINUE] and press to resume printing. If that option is not available, select [STOP] and press and then restart printing from the beginning. • Other printers or if the error still persists with a Canon printer: If printing does not resume automatically, disconnect the USB cable and turn off the camcorder. After a short while, turn on the camcorder and restore the USB connection. IMPORTANT • You may not be able to print correctly with a PictBridge-compatible printer photos whose file names have been changed or that were recorded, created, edited or changed with any device ...
Otros modelos de este manual:Videocámaras - FS20 (5.52 mb)
Videocámaras - FS200 (5.52 mb)
Videocámaras - FS22 (5.52 mb)