


Votos - 4, Puntuación media: 4.5
(

 )
)
|
Fotos y especificaciones Sony HT-CT350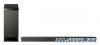 |


Otros manuales para este modelo:
Cine en casa - HT-CT350 (11.31 mb)
Cine en casa - HT-CT350 (11.36 mb)
Resumen del manual
Connecting the TV and player, etc. . By connecting Sony “BRAVIA” Sync-compatible components using HDMI cables and by setting the Control for HDMI function via the TV for each connected component, operation can be simplified. See ““BRAVIA” Sync Features” (page 38). DVD player, etc. TV HDMI OUT HDMI cable (not supplied) HDMI cable (not supplied) SAT/CATV IN BD INDVD IN HDMI DIGITAL SPEAKERS TV OUT ARC ANTENNA AM FM 75 COAXIAL AUDIO IN R L TV AUDIO IN SA-CD/CD DMPOR DC 5V 0.7A MAX COAX IN VIDEO OPT IN TVSAT/CATV R CENTER ONLY FOR SS-CT350 L (supplied) Blu-ray Disc player, etc. HDMI OUT HDMI cable HDMI cable Digital optical cord (not supplied) Rear of the subwoofer HDMI IN Digital Audio OUT (optical) Digital optical cord for a TV Satellite tuner or cable television tuner, etc., with an HDMI jack HDMI OUT Digital Audio OUT (optical) (not supplied) (not supplied) 22GB Notes Notes The system is compatible with the Audio Return Channel (ARC) function. If you connect the system to the ARC- compatible TV’s HDMI jack via an HDMI cable, you do not need to connect the TV to the system with the digital optical cord (page 42). • You can see the letters “ARC” beside the TV’s HDMI jack if it is compatible with the ARC function. Even if you connect an HDMI cable to the jack, if the HDMI input jack is not compatible with the ARC function, you cannot use the ARC function. • The ARC function is available only when Control for HDMI is set to on. • Depending on the satellite tuner, multi-channel sound may not be output. In this case, connect a digital optical cord in addition to an HDMI cable and set “INPUT MODE” to “OPT” in the AMP menu (page 50). • Connect a “PlayStation 3,” etc., to any available HDMI jack. All the HDMI jacks on the system function in the same way. • The HDMI jack connections have priority when you connect different components to the system using the INPUT OPT/INPUT COAX and HDMI jacks. • When connecting a TV that does not have a digital optical audio output jack, connect the TV to the system using an analog audio cord (not supplied). Tip • Even if the system is turned off (active standby mode), the HDMI signal will be sent from the connected component to the TV via the HDMI connection. You can enjoy image and sound from the component on the TV. Notes on HDMI connections • Use a High Speed HDMI cable. If you use a Standard HDMI cable, 1080p, Deep Colour, or 3D images may not be displayed properly. • Sony recommends that you use an HDMI-authorized cable or Sony HDMI cable. • Check the setup of the connected component if an image is poor or the sound does not come out of a component connected via the HDMI cable. • Audio signals (sampling frequency, bit length, etc.) transmitted from an HDMI jack may be suppressed by the connected component. • Sound may be interrupted when the sampling frequency or the number of channels of audio output signals from the playback component is switched. • When the connected component is not compatible with copyright protection technology (HDCP), the image and/or the sound from the HDMI TV OUT jack may be distorted or may not be output. In this case, check the specification of the connected component. • We do not recommend using an HDMI-DVI conversion cable. • When “TV,” “DMPORT,” “SA-CD/CD,” “VIDEO,” “TUNER FM,” or “TUNER AM” is selected for the input source of the system, video signals via the HDMI input jack (BD, DVD, SAT/CATV) that was selected last time are output from the HDMI TV OUT jack. • This system supports Deep Colour, “x.v.Colour,” and 3D transmission. • To enjoy 3D images, connect 3D-compatible TV and video components (Blu-ray Disc player, Bluray Disc recorder, “PlayStation 3,” etc.) to the system using High Speed HDMI cables, put on 3D glasses, and then play back 3D-compatible content. Getting Started 23GB Connecting other components Connecting other components (page 39). Other audio components, etc. DVD player, etc. Audio signal OUT Digital coaxial cord Audio cord (not supplied) (not supplied) VIDEO OUT Digital Audio OUT (coaxial) To the VIDEO IN of the TV. SAT/CATV IN BD INDVD IN HDMI DIGITAL SPEAKERS TV OUT ARC ANTENNA AM FM 75 COAXIAL AUDIO IN R L TV AUDIO IN SA-CD/CD DMPORT DC 5V 0.7A MAX COAX IN OPT IN VIDEOTVSAT/CATV R ENTER ONLY FOR SS-CT350 L DIGITAL MEDIA PORT adapter Rear of the subwoofer Satellite tuner or cable television tuner, etc., without an HDMI jack Digital optical cord (not supplied) To the VIDEO IN of the TV. VIDEO OUT Digital Audio OUT (optical) Notes • Do not connect or disconnect the DIGITAL MEDIA PORT adapter while the system is turned on. • When you connect the DIGITAL MEDIA PORT adapter, be sure the connector is inserted with the arrow mark facing toward the arrow mark on the DMPORT jack. To detach the DIGITAL MEDIA PORT adapter, press and hold A and then pull out the connector. A 24GB Connecting the antenna (aerial) Connecting the antenna (aerial) The shape and the length of the antenna (aerial) is designed to receive AM signals. Do not dis...