


Votos - 6, Puntuación media: 4.5
(

 )
)
|
Fotos y especificaciones Samsung SF-760P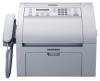 |


Resumen del manual
Scan and save your scanned image. 7 Scanning with Samsung Scan Assistant • This feature may not be available depending on model or optional goods (see "Features by models" on page 7). • You can use the OCR (Optical Character Reader) feature from Samsung Scan Assistant program. Make sure that the machine is connected to your computer and 1 powered on. Load originals face down into the document feeder (see "Loading 2 originals" on page 44). Click Start > All programs > Samsung Printers, and start Samsung 3 Scan Assistant. Select the Help menu or click the button from the window and click on any option you want to know about. Set the scan options. 4 Click Scan. 5 Scanning with SmarThru Office • This feature may not be available depending on model or optional goods (see "Features by models" on page 7). •To use SmarThru Office, you have to install the program manually from the supplied CD. Select Advanced Installation > Custom Installation and choose SmarThru Office to install. • You can use the OCR (Optical Character Reader) feature from SmarThru Office program. 3. Special Features 153 Scan features Scan features 1 1 22 Make sure that the machine is connected to your computer and powered on. Load originals face down into the document feeder (see "Loading Macintosh scanning 2 originals" on page 44). Scanning from USB connected machine Double-click the SmarThru Office icon. 3 The SmarThru Office appears. 4 Select the Help menu or click the button from the window and click on any option you want to know about. Click the SmarThru Office icon ( ) in the tray area of the Windows 5 taskbar to activate the SmarThru Office launcher. Click the scanning icon ( ) to open the scanning window. 6 The Scan Setting window opens. 7 Set scan settings and click Scan. 8 Make sure that the machine is connected to your computer and 1 powered on. Load originals face down into the document feeder (see "Loading 2 originals" on page 44). Start Applications and click Image Capture. 3 If No Image Capture device connected message appears, disconnect the USB cable and reconnect it. If the problem continues, refer to the Image Capture’s help. Select the option you want. 4 Scan and save your scanned image. 5 If scanning does not operate in Image Capture, update Mac OS to the latest version. Image Capture operates properly in Mac OS X 10.4.7 or higher. 3. Special Features 154 Scan features Linux scanning Scanning Make sure that the machine is connected to your computer and 1 powered on. Double-click the Unified Driver Configurator on your desktop. 2 Click the button to switch to Scanners Configuration. 3 Select the scanner on the list. 4 Click Properties. 5 Place a single document face down on the document glass, or load the 6 documents face up into the ADF. From the Scanner Properties window, click Preview. 7 The document is scanned and the image preview appears in the 8 Preview Pane. Drag the pointer to set the image area to be scanned in the Preview 9 Pane. Select the option you want. 10 3. Special Features 155 Scan features Scan features Scan and save your scanned image. For later use, you can save as your scan settings and add it to the Job Type drop-down list. Editing an image with Image Manager The Image Manager application provides you with menu commands and tools to edit your scanned image. 3. Special Features 156 Fax features • For basic scanning features, refer to the Basic Guide (see "Basic faxing" on page 68). • This feature may not be available depending on model or optional goods (see "Features by models" on page 7). Automatic redialing When the number you have dialed is busy or there is no answer when you send a fax, the machine automatically redials the number. The redial time depends on the country's factory default setting. When the display shows Retry Redial?, press (Start) button to redial the number without waiting. To cancel the automatic redialing, press (Stop/ Clear). To change the time interval between redials and the number of redial attempts. Press (fax) > (Menu) > Fax Setup > Sending on the control 1 panel. Select Redial Times or Redial Term you want. 2 Select the option you want. 3 25 Redialing the fax number 1 Press (Redial/Pause) on the control panel. 2 Select the fax number you want. Ten recently sent fax numbers with ten received caller IDs are shown. 3 When an original is loaded in the document feeder, the machine automatically begins to send. 26 Confirming a transmission When the last page of your original has been sent successfully, the machine beeps and returns to ready mode. When something goes wrong while sending your fax, an error message appears on the display. If you receive an error message, press (Stop/Clear) to clear the message and try to send the fax again. You can set your machine to print a confirmation report automatically each time sending a fax is completed. Press (fax) > (Menu) > Fax Setup > Sending > Send Report on the control panel. 3. Special Features 157 Fax features Sending a fax in the...
Otros modelos de este manual:Impresoras - SF-760 (5.42 mb)
Impresoras - SF-760P/TED (5.42 mb)
Impresoras - SF-760P/XAA (5.42 mb)
Impresoras - SF-760P/XFA (5.42 mb)